Solids of Revolution - The Washer Method
I used the following notebook to demonstrate finding the volume of solids of revolution using approximating washers. After evaluating the first command in this notebook, you will be asked "Do you want to automatically evaluate all the initialization cells in the notebook?" Click Yes, and Mathematica will automatically evaluate the commands under "Initialization Code."
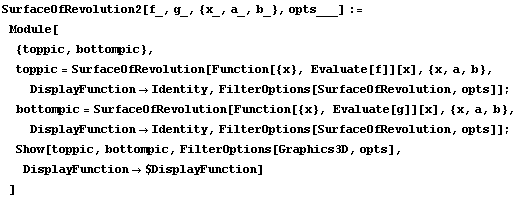
The most complicated part of these graphics is dealing with the many options involved: What are we rotating around? Do I want to look at the solid from the top, the bottom, the side, or somewhere else? This picture is too tall (or short)--how can I make it a more manageable size? To keep things from being too intimidating for my students, I set a bunch of defaults for the particular example I was doing in the initialization section.
First, I made a picture of the solid generated by rotating the region between  and
and  around the x-axis. The code for SurfaceOfRevolution2 is in the initialization section, but it basically draws the two surfaces (one for each bounding curve) and combines them together in a single picture. I used two different viewpoints to help visualize the solid. I named the first picture pic3 so I could use it in a later example.

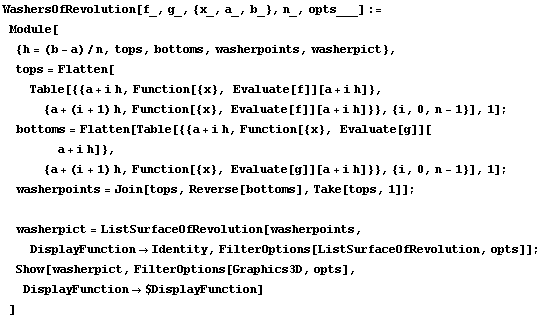
Here, we see the solid sliced up into ten approximating washers. Again, I used two viewpoints, matching the two earlier viewpoints.

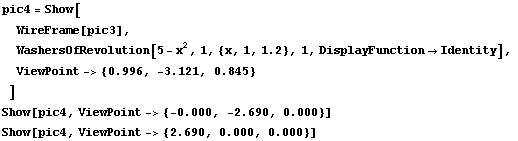
The last picture is a little more complicated. I combined a wireframe version of the original graphic with a single washer slice using the Show function. The argument DisplayFunction Identity is needed to prevent the slice from showing up as its own picture. I used three different viewpoints: the original viewpoint, along the slice, and along the axis of revolution.
Initialization Code