If you want to work with both Mathematica and Java, you need to have a project that is configured for both. A convenient way to set this up is to use the New JLink Project wizard. This is useful if you just want to add pre-built Java Jar archives to the project, or if you want to write your own Java code.
The wizard is launched in the typical way: from the menu bar use
File > New > Project, open
the Mathematica section and choose JLink Project.
You should enter the relevant details and continue through
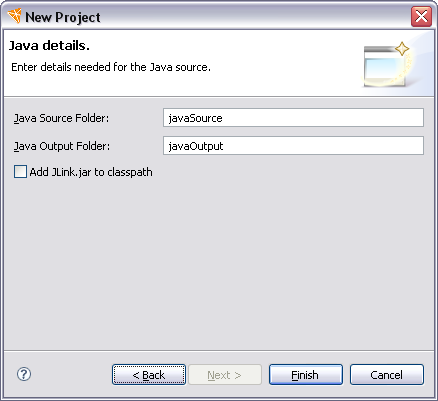
the wizard. The last page of the project looks as shown below.
Typically the suggested locations are adequate, but you can change the folder for Java source and where the Workbench will put Java classes it has built. If you want to write Java code that uses the J/Link API directly, you should add the container for J/Link classes, JLink.jar, to the classpath.
When the project is created, its contents are similar to those shown below.
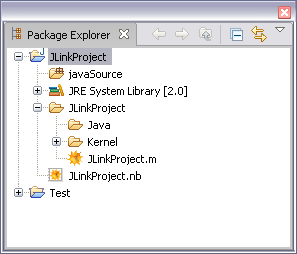
When the project is created, you can place Java code in the Java source folder. Mathematica code can go into the usual places. For this example, it could go into the JLinkProject.m file. If you have Jar files, these can go into the Java folder.
When the project was created, all the relevant Java classpaths and Mathematica resources were configured to make things work. However, if you wanted to use other locations, for example using a different location for Java output, you would have to modify the Java configuration and the Mathematica project paths.
 Deploying a J/Link Project
When you have created a J/Link project, you can deploy it in a number of ways. This is done with the Mathematica Project Export wizard.
Existing Java Projects
If you already have a Java project, you can add Mathematica code and then set the Mathematica project nature and builder.