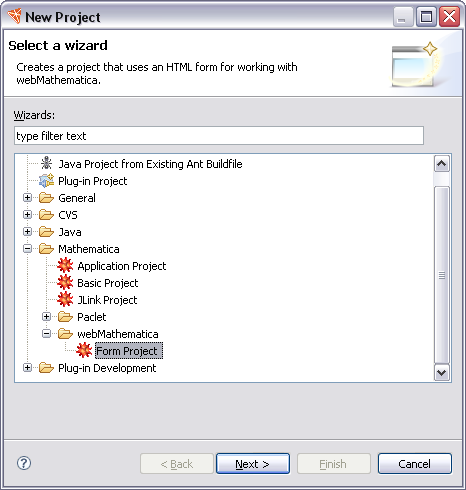
A good starting point is to create a webMathematica project. One convenient way to do this is with a wizard. From the menu bar choose File > New > Project. In the dialog that comes up, choose Web Form Project from the Mathematica section.
The pages of the wizard ask you to give a name to the project, for example Project1. They also create a number of useful resources such as Mathematica code and JSP pages in the project. When you complete the wizard you can see all the project resources that have been built in a view, such as the Package Explorer view.
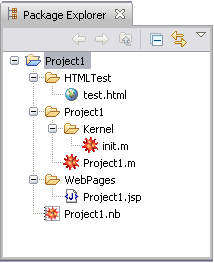
In the project you can see a folder, HTMLTest, with an HTML file, test.html. This is provided to help test the project. There is also a folder, Project1, which contains a Mathematica application. This consists of Mathematica code that you can run on your server. If you have several pages that use the same functions it is sensible to put the definitions into here. Finally a folder, WebPages, is created that contains a webMathematica JSP page. This has been set up to work with your code and contains a sample webMathematica example.
You can open one of the pages by clicking on its name in the view. It will open in a custom editor; for example, the contents of the JSP are shown below.
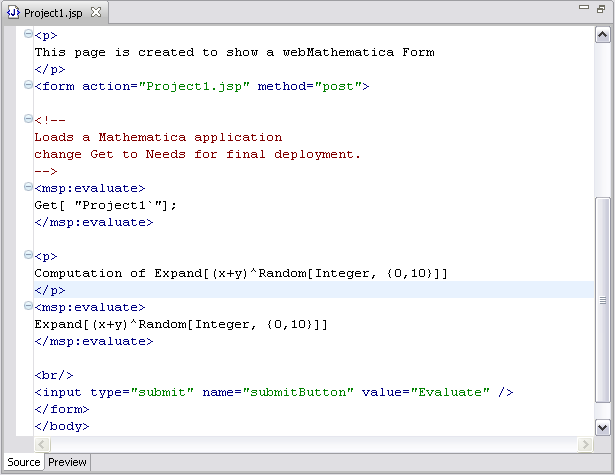
This shows the typical tags that webMathematica provides for embedding Mathematica code in your web server. More information on these tags is found in the reference section. Note also the syntax coloring for the different elements of the page. There are also Source and Preview tabs; the latter gives you some rough idea of the appearance of the page.
If you click on any of the Mathematica source code it will open in the Mathematica source editor. In fact a webMathematica project is just a Mathematica application project with some extra components. You could work with the Mathematica components, for example, executing the code as you would with any other Mathematica project.