Authoring Symbol Pages Using DocumentationTools
A symbol page focuses on a single function or option, providing its different input templates with corresponding usage, additional notes including the function's options, if any, and a set of examples. Sections are provided to link to other related documents.
The material below assumes that you have already set up an appropriate directory structure for saving and working with documentation using the DocumentationTools package. If you are working from Workbench it will already have been done once you have set up your project there. Otherwise, with "MyApplication" representing the name of your application, create the directory structure MyApplication > Documentation > English and the directories Guides, ReferencePages, and Tutorials inside the English directory. Then create the directory Symbols within the ReferencePages directory. If you have already written a package or packages for your application, make sure they are in the MyApplication directory with a Kernel subdirectory containing the project's init.m. The MyApplication directory should be in a location suitable for Mathematica to load the application. If you are working from Workbench, this has been done.
Setting Up DocumentationTools
1. Choose Palettes ► DocumentationTools from the Mathematica menu bar. A gray palette will appear on the right side of the screen. Select the F tab at the top of the palette for function page authoring tools.
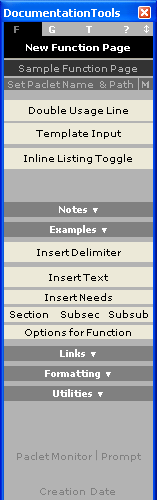
2. If you are not starting Mathematica from a project within Workbench, you will need to configure DocumentationTools. Click Set PacletName & Path near the palette's top and navigate to the English directory of your application. This will activate the links in the authoring notebooks for testing purposes.
Note: If the palette appears nonfunctional, open the Option Inspector (Format ► Option Inspector) and check that DynamicUpdating->Automatic in the Global Preferences.
Authoring
If you clicked F > Utilities > Generate Function Pages (having already written one or more .m's and positioned them and a corresponding init.m correctly) most of the fields described below will already contain content in the proper formatting, with the exception of the examples, which will still need to be written.
Note: The authoring notebooks contain a series of placeholders that will not be included with the build unless you explicitly edit them. These placeholders will typically contain four X's.
Note: A sample symbol page can be found by clicking Sample Function Page near the top of the DocumentationTools palette.
Usage and Templates
1. Clicking New Function Page brings up a dialog requesting that the name of the new function be specified.

2. Once that is done, clicking OK will construct a new function page with the symbol name and metadata already filled in. In addition, the function page will be saved in the project's Symbols directory. The dialog that comes up is informational and may be permanently dismissed if so desired.


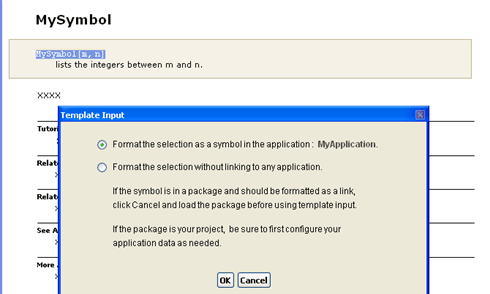
The Template Input dialog will appear. Select the top radio button and click OK to format the selection as a symbol in the application. This is the preferred formatting for your function template and any occurrences of your package function names in the authoring notebooks.
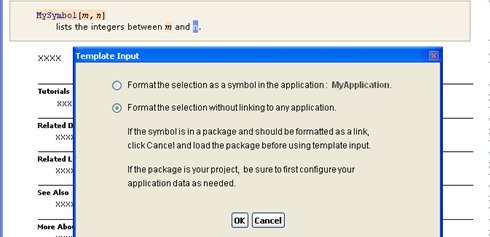
Individually highlight the inputs for the function in the usage message ("m" and "n" in this example) and select Template Input. The Template Input dialog will again appear. Select the bottom radio button and click OK to format the selection without linking to any application. This is the preferred formatting for the inputs for your functions.
5. To add another function template with usage, move the cursor to the end of the current usage message and click Double Usage Line on the DocumentationTools palette.

Note: Template Input should be used to format any references to the function or its inputs anywhere in your documentation notebook.
Note: Template Input should also be used to format any references to Mathematica functions. However, as these functions are built into the Mathematica kernel, a dialog will not appear when Template Input is clicked.
Notes and Options Tables
1. The Notes section of the notebook directly below the tan usage cell is for documenting options, common uses, implementation syntax for different results, etc. Use the Template Input button as above to format and link symbols and format templates in notes cells.
Enter an options table by placing the cell insertion bar above or below a notes cell and doing one of the following:
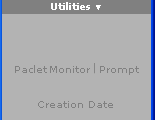
- If you have already written a package (.m) file, click the PacletMonitor button and the Load button in the resulting dialog. When the dialog indicates that the application is loaded, select Notes ► Options Table on the DocumentationTools palette. A dialog will open. Check the options you want to include, add descriptions in the input fields, and click Insert.
- If not, position your cursor between cells where you want to insert an options table, click Insert Custom Table to insert a table with a number of rows that you specify, and in the resulting dialog choose 3 Column and click OK. Otherwise select Notes ► 3 Col on the DocumentationTools palette. Add rows as needed. For each option, you will need to highlight it, select Template Input, select the upper radio button from the dialog that appears, and click OK. The options go in the left column, default settings (or values) in the middle column, and a short description in the right column.

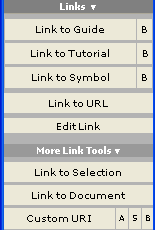
2. To link to other guides, tutorials, or symbols in the application, highlight the text, select Links on the DocumentationTools palette, and choose the appropriate link destination.
Adding Cross-Links
Authoring notebooks have several sections devoted to different cross-references. The Tutorials section is for links to related tutorials, the Related Demonstrations section is for URL links to related demonstrations, the Related Links section is for other related pages (including web pages), the See Also section is for links to other function pages, and the More About section is for links to guide pages.

The suggested conventions are as follows. For all sections excluding the See Also sections, cross-links should appear in separate cells.

Start typing in any section to add text. Then make a selection, click on Links on the DocumentationTools palette, and pick the type of link from the column. (Expand More Link Tools for more options.)
The See Also section is typically arranged in a horizontal inline listing orientation. Under the See Also section, enter a list of function names (which may be symbols from your application or Mathematica symbols) with each pair of function names separated by a space, then a period, and then another space, as seen below. The list may extend over a number of lines. If you want to include a link to a symbol in another application, include it as otherlinkbase/ref/symbol, where otherlinkbase is usually the other application's name.
Then highlight the cell bracket and click Inline Listing Toggle near the top of the DocumentationTools palette. DocumentationTools will create the links and inline listing structure automatically. If you later want to add more functions to the list, select the cell bracket and click Inline Listing Toggle. The function list will again be plain text. Add more function names and then click Inline Listing Toggle again.
Examples
1. Navigate to the Examples section in the authoring notebook and place the cell insertion bar just below the header. Then select Examples ► Insert Text on the DocumentationTools palette.
Since the functions in the application are not part of the kernel, a Needs statement must be included. This can be done by selecting Examples ► Insert Needs on the DocumentationTools palette. Each group of related examples should be separated by a delimiter, which can be added by selecting Examples ► Insert Delimiter. Each group of examples will require a Needs statement to work in the notebooks built via Workbench.
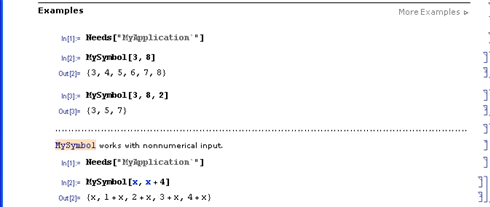
Note: The most effective examples introduce a single new feature of a function. Crowding examples together with multiple options can make it difficult for users to determine what each of the options does.
2. Examples can also be added in the More Examples section using the same procedure mentioned above.

Adding Search Index Information
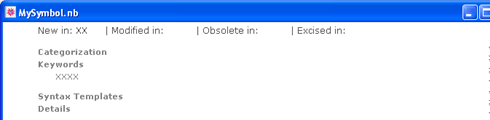
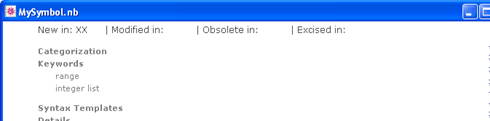
"Keyword" cells are what the Mathematica search index uses when cataloging the authoring notebooks, and are not case-sensitive.
Keywords are set up to return the page in the list of search results if a user were to search for that word in the Documentation Center.