When you have written the documentation for your application and built it, you will need to deploy it so that it can be used in Mathematica as an installed AddOn. This can be done from the Application Tools.
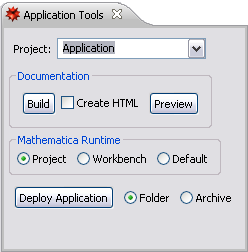
The Application Tools can be opened from the menu bar, by selecting Window > Show View > Application Tools. (If you are not in the Mathematica perspective you need to select Window > Show View > Other and look in the Wolfram section.) The Application Tools look as shown below.

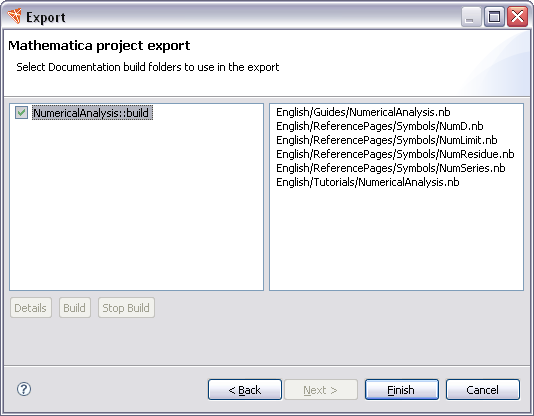
To deploy the application you select the project and use the Deploy Application button. This launches a project export wizard, exporting to an archive or a file system. When the project export wizard notices that you have application documentation, it inserts a wizard page to add documentation. An example is shown below.

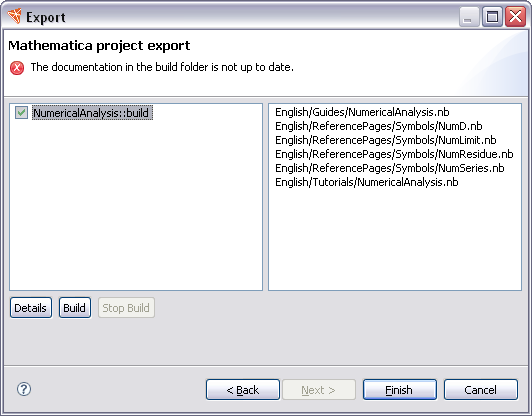
The wizard checks that you have built the source notebooks, and that they are all up to date. If this is not the case, it will give a message, and you will be able to run the documentation build. In the following, the wizard has detected that one of the built notebooks is not up to date and a message is produced. Note how the Build button is enabled. If you clicked this, it would run a documentation build.

After the application has been deployed you can install it in one of the locations from which Mathematica can load applications, for example, $BaseDirectory/Applications or $UserBaseDirectory/Applications. This is described in the installing applications section. A sample installation of an application is shown below.
  $UserBaseDirectory/

    Applications/

      NumericalAnalysis/
        PacletInfo.m
        NumericalAnalysis.m
        Kernel/
          init.m
        Documentation/
          English/
            Guides/
              NumericalAnalysis.nb
            Tutorials/
              NumericalAnalysis.nb
            Reference/
              Symbols/
                NumD.nb
                NumLimit.nb
                NumSeries.nb
                NumResidue.nb
Note that the documentation notebooks in the installed application are the built notebooks, and not the source notebooks. (The source notebooks are those you write; these are converted to the built notebooks.)