


MicrocontrollerEmbedCode
MicrocontrollerEmbedCode[sys,μc,p]
embeds the systems model sys to the microcontroller μc using p.
Details and Options
- MicrocontrollerEmbedCode generates the source code for sys to work with the microcontroller specification μc, compiles it, and embeds the resulting machine code to the μc.
- In addition a MicrocontrollerCodeData object is generated that can be used to obtain various properties.
- The systems model sys can be a discrete-time TransferFunctionModel, StateSpaceModel, AffineStateSpaceModel, NonlinearStateSpaceModel, or SystemsConnectionsModel.
- The microcontroller μc is given as an association with the following primary keys:
-
"Target" target name "Inputs" input channels "Outputs" output channels - Possible input and output channel specifications:
-
cnametype channel cname configured as type cname<"Type"type> channel cname configured as type cname<"Type"type,s1v1,…> additional specifications type cname for type is unique <"Type"type,…> or Automatic-><"Type"type,…> cname for type is unique - Other possible keys for μc:
-
"ADC" A/D conversion specifications "ClockFrequency" frequency of the microcontroller's system clock "I2CAddress" I2C address when operating as a I2C slave device "Microcontroller" microcontroller to generate code for "OperatingVoltage" operating voltage of the microcontroller "Serial" serial communication specifications "SerialOverUSB" serial over USB specifications "SlaveSelect" slave select pin when operating as a SPI slave device "Timer" timer or counter number - Keys of μc to directly inject code into the source code:
-
"IncludeFiles" files to include "Definitions" definition of macros "Declarations" function declarations "Utilities" utility functions and variables "Initializations" program initialization "Loop" execute at each sampling instant "PreLoop" execute before "Loop" "PostLoop" execute after "Loop" "UntimedLoop" execute repeatedly whenever the processor is free - The programming mechanism p is specified as an association.
- Possible keys of p include:
-
"BaudRate" baud rate at which to embed the code "ConnectionPort" port where external programmer is connected "ExternalProgrammer" external programmer to be used "ProgrammerName" programmer to be used "ProgrammerConfigurationName" programmer configuration to be used "ProgrammerConfigurationInstallation" location of the programmer configuration software "ProgrammerInstallation" location of the programmer software - If p is a string the external programmer is assumed to be connected to the serial port p.
- MicrocontrollerEmbedCode[sys,μc,p,specs] can be used to give additional specifications.
- The specifications specs is as association with the following possible keys:
-
"CleanIntermediate" True whether temporary files should be deleted "CompileOptions" Automatic options to pass through to the compiler "CompilerInstallation" Automatic location of the compiler software "CompilerName" Automatic which compile command to use "CreateBinary" Automatic whether the machine code should be created "I2C" {} external I2C device specifications "IncludeDirectories" {} directories to add to the include path "Language" Automatic source code language "Libraries" {} libraries to use to build the executable "SPI" {} external SPI device specifications "WorkingDirectory" Automatic directory where temporary files are generated
Examples
open all close allBasic Examples (1)
Scope (37)
Digital Output (2)
Pulse Output (2)
Analog Output (5)
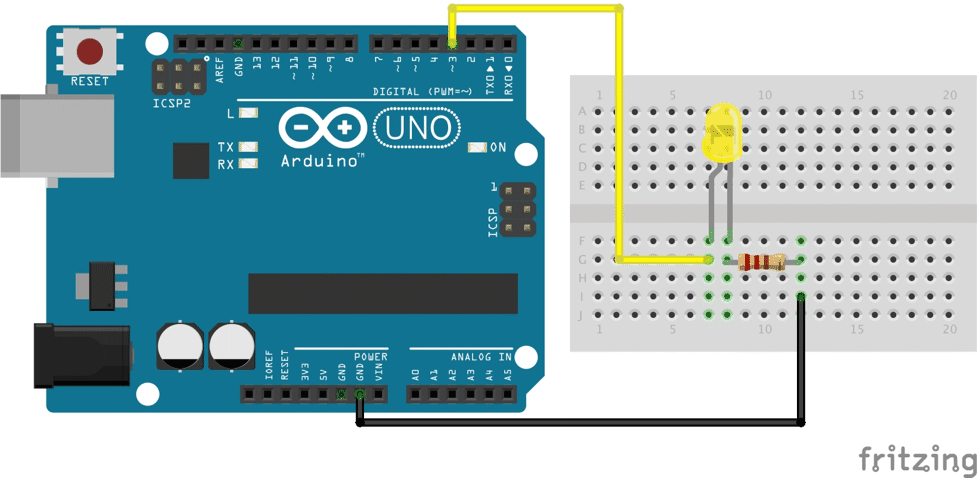
Turn on the LED connected to pin 3 at half brightness:
Turn it on at a different brightness level:
Analog output only works with pins having pulse-width modulation:
Specify a range, if necessary, to properly scale the output:
Get the LED to glow with maximum brightness:
Analog signals with positive and negative values need a second pin for direction:
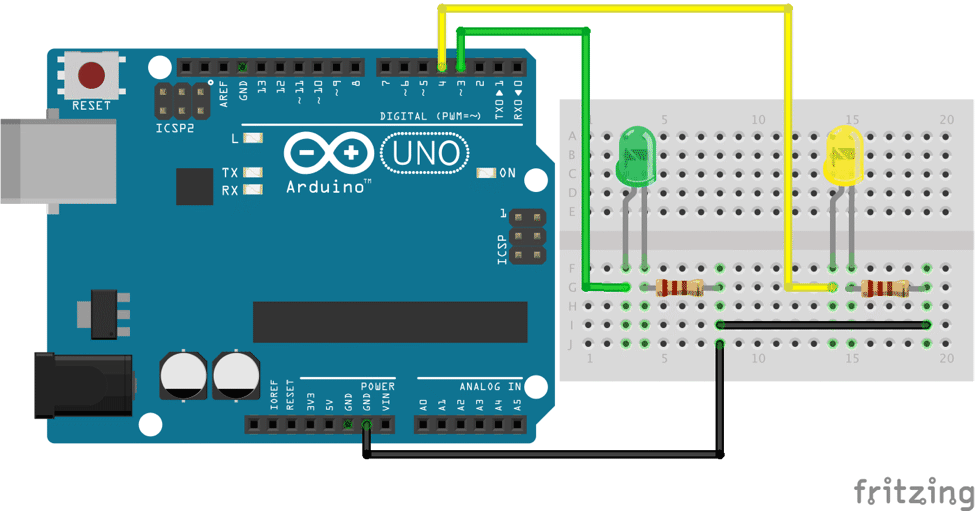
The LED at pin 3 glows with half brightness and the LED at pin 4 is turned on:
The LED at pin 4 is turned off:
The LED at pin 4 is turned on for positive values:
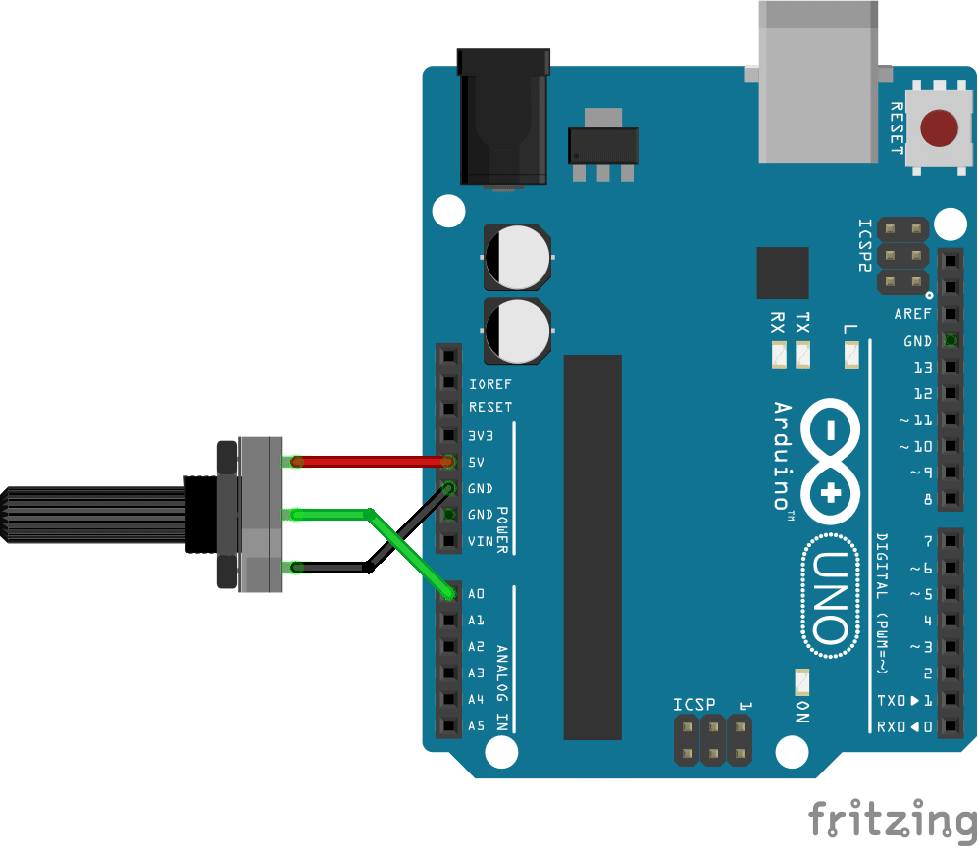
Analog Input (3)
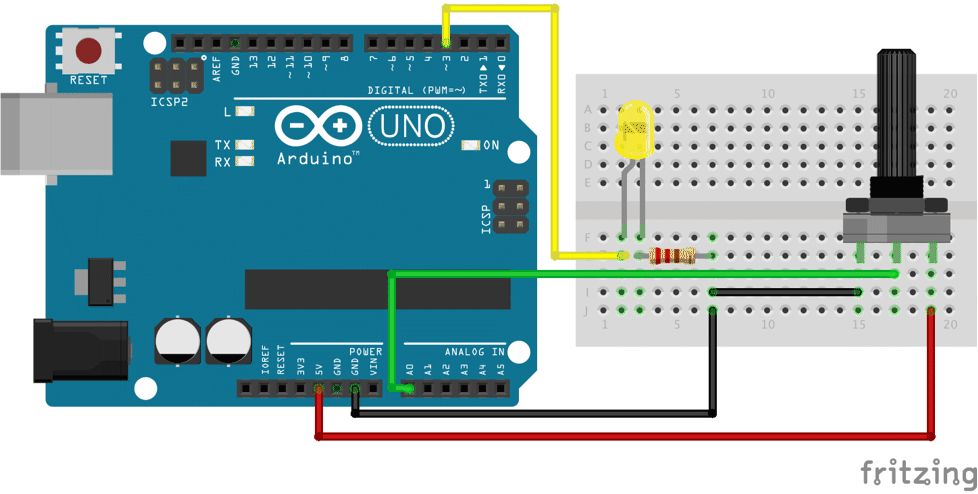
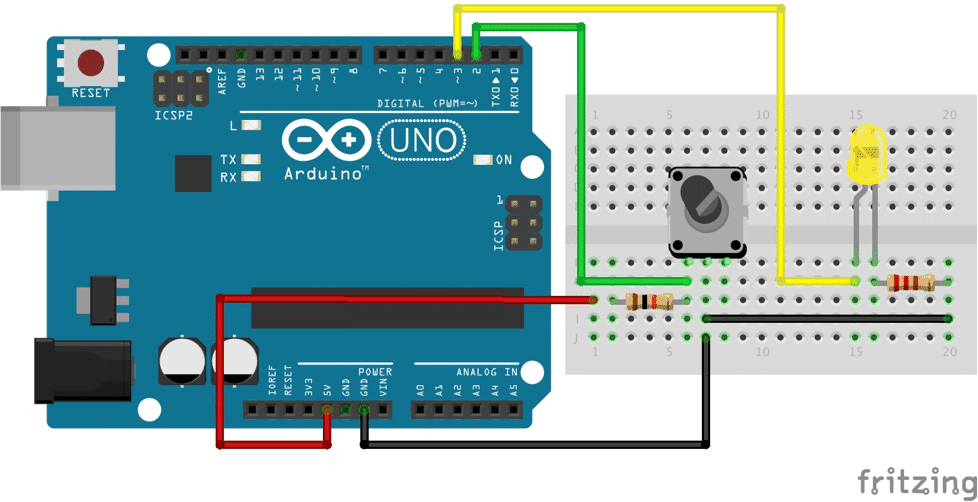
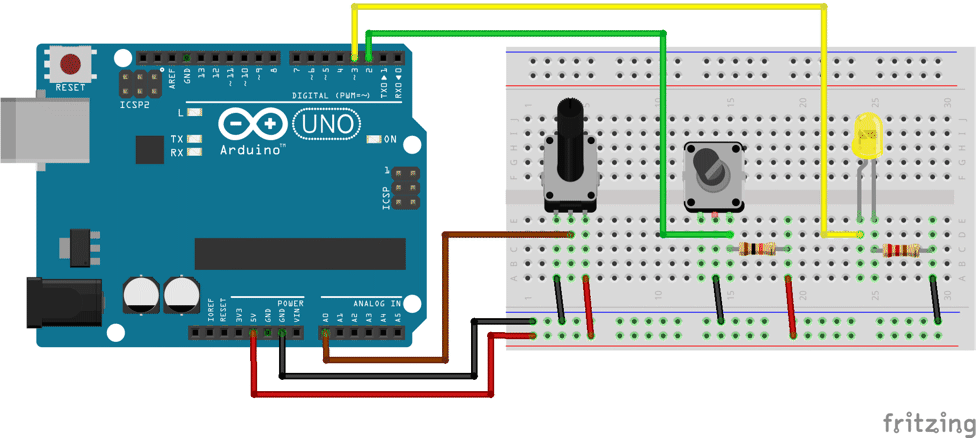
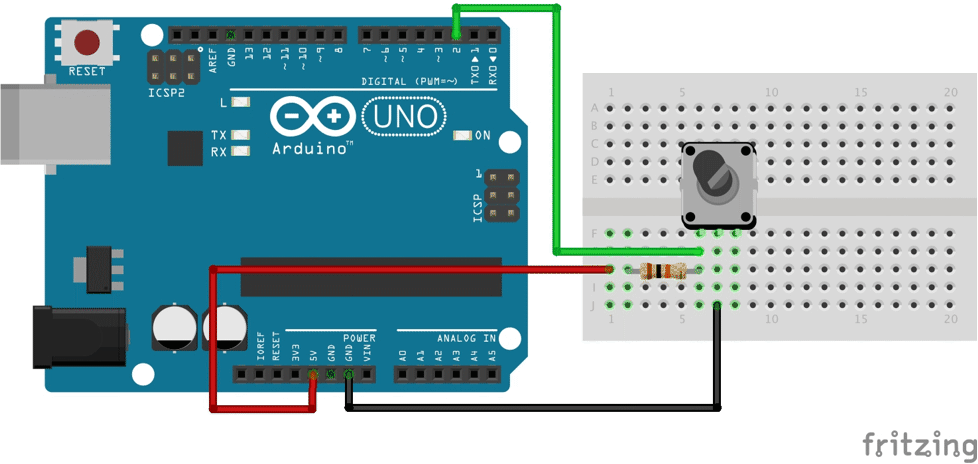
Read the potentiometer connected to "A0" and use it to adjust the brightness of the LED on pin 3:
Use different voltage references:
Use the voltage of 5V applied at the "AVCC" pin:
Use the internal reference voltage:
Use the voltage of 3.3V applied at the AREF pin:
Specify the prescaler to be used by the input clock of the ADC:
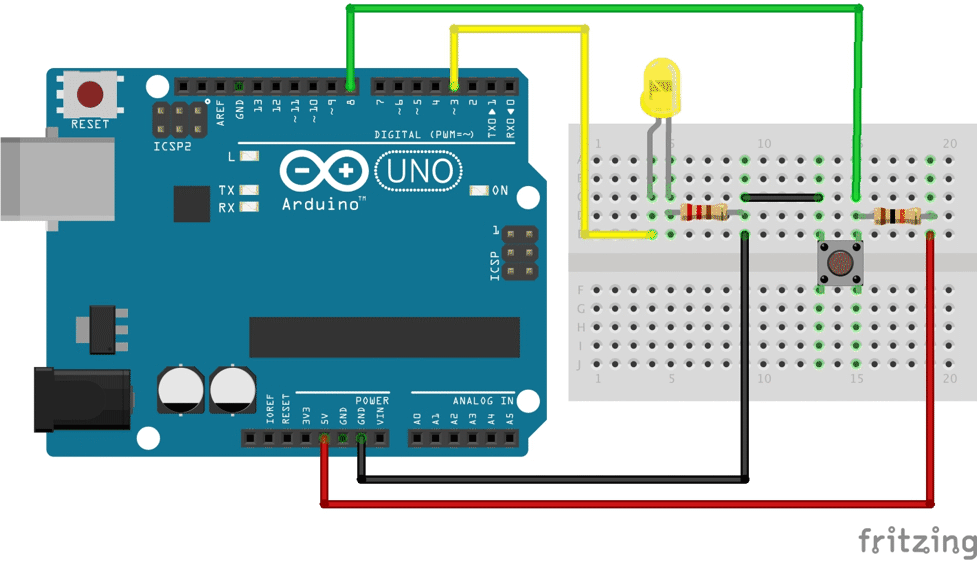
Digital Input (3)
Serial (RS-232) Communication (2)
Set up the microcontroller to send and receive numerical data:
The serial type can also be directly given, since the serial pins are unique on the Arduino Uno:
Open a serial connection to the device:
Set up a task to read and write data:
Remove the task and close the device after some time:
Serial Peripheral Interface (SPI) Communication (1)
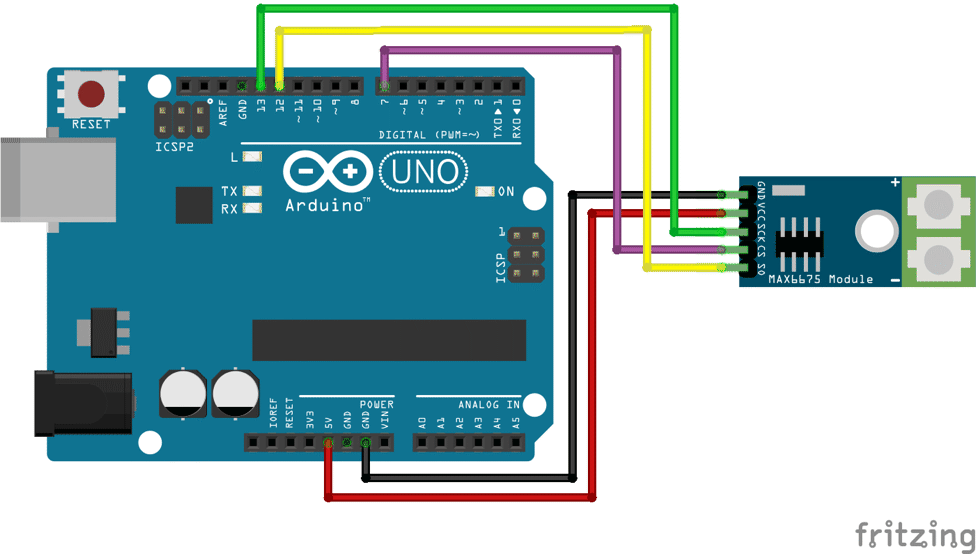
The MAX6675 thermocouple is a SPI sensor whose data can to be read in two bytes: »
The conversion from bytes to obtain the temperature in ° C:
Specify the sensor as a SPI slave device with pin 7 as the slave select pin:
The output is sent over the serial (RS-232) channel:
Embed code to read the sensor and transmit the result:

Open a connection to the Arduino:
Set up a scheduled task to read the data:
Inter-Integrated Circuit (I2C) Communication (1)
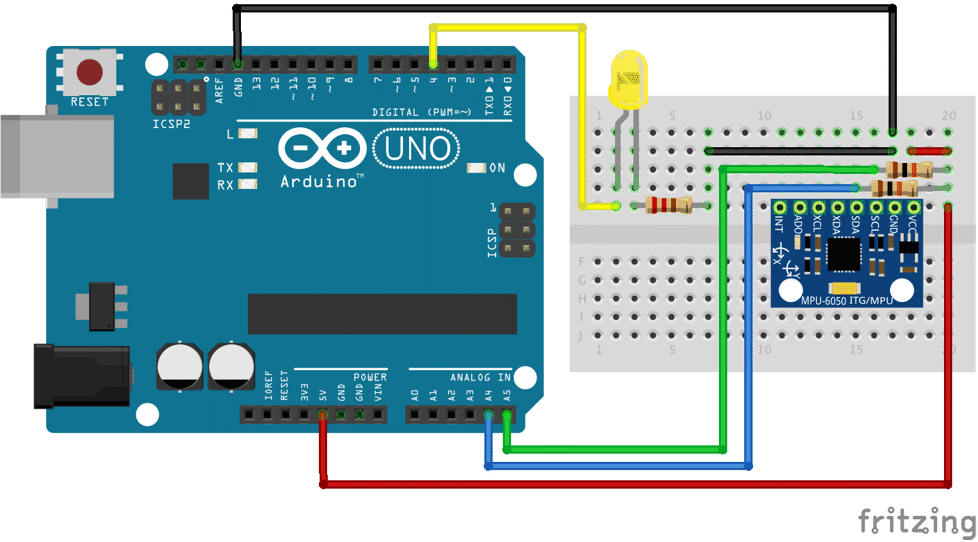
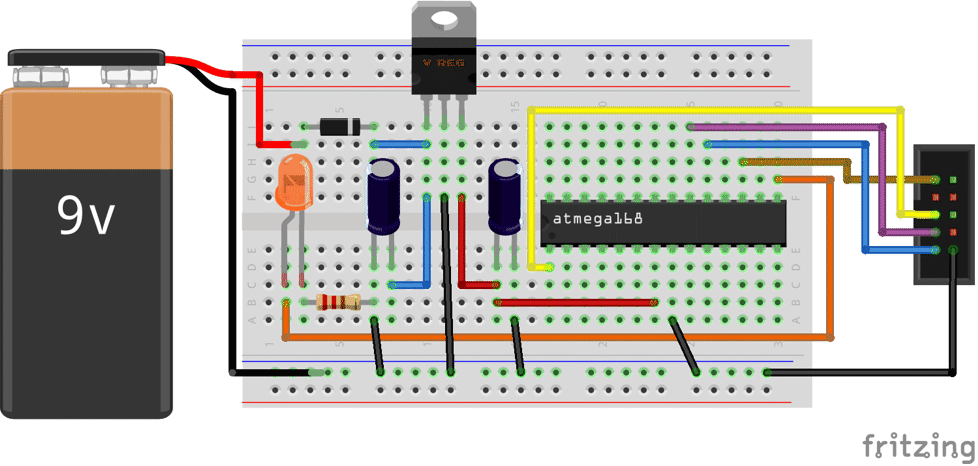
Measure the temperature using a MPU6050 sensor. The data is in two registers beginning at 0x41: »
The sensor address is 0x68 and its power management register at 0x6B needs to be initialized:
A function to assemble the two bytes that are received:
The systems model to convert it to degrees C:
The model to output a high value if the temperature is over 25° C:
The complete model which reads the temperature and outputs a high or low value:
The embedded code will turn on an LED at pin ![]() if the temperature is greater than 25° C:
if the temperature is greater than 25° C:
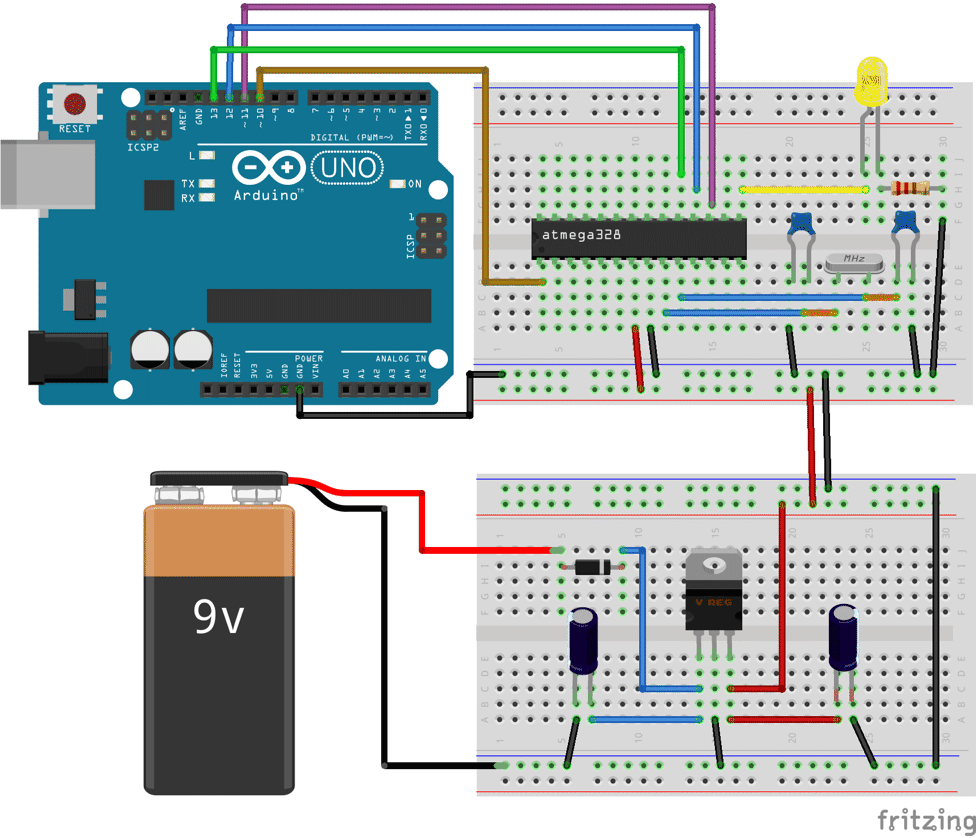
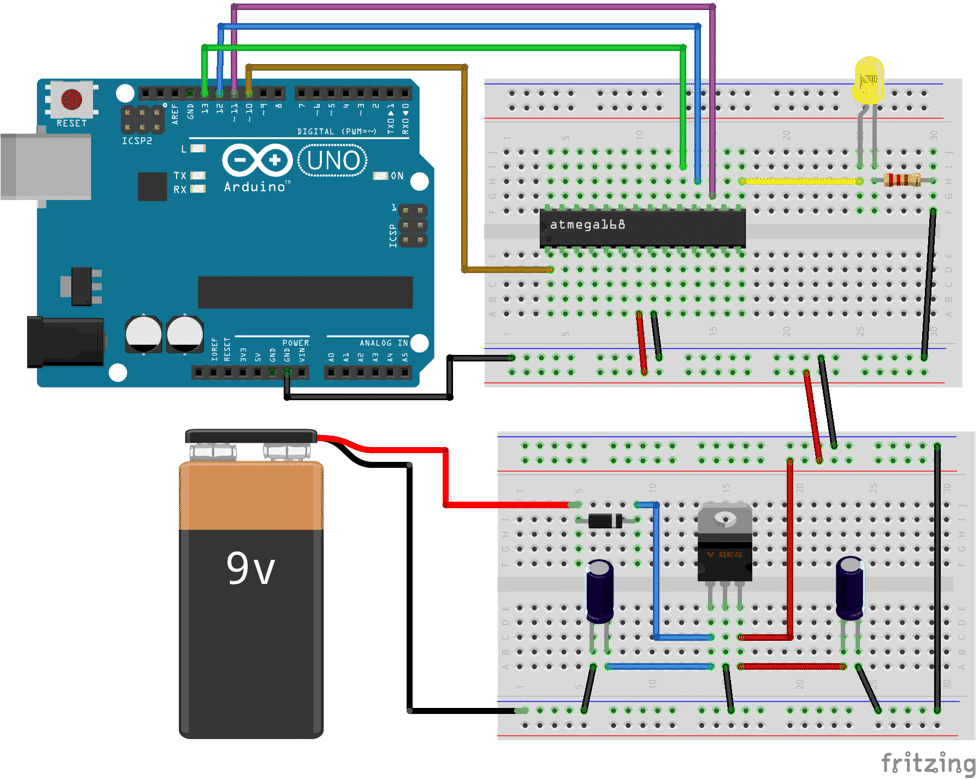
External Libraries (1)
Systems Models (6)
Embed a system with two inputs and one output:
Embed a system with two inputs and two outputs:
The serial start, delimiter, and end bytes:
Open a connection to the microcontroller:
Set up a task that sends one input signal and receives two output signals every time period:
A function to parse the actual and reference speed values coming though the serial connection:
Remove the task and close the device after some time:
Specify a state-space model directly as a difference equation:

Embed a nonlinear model of a simple pendulum:
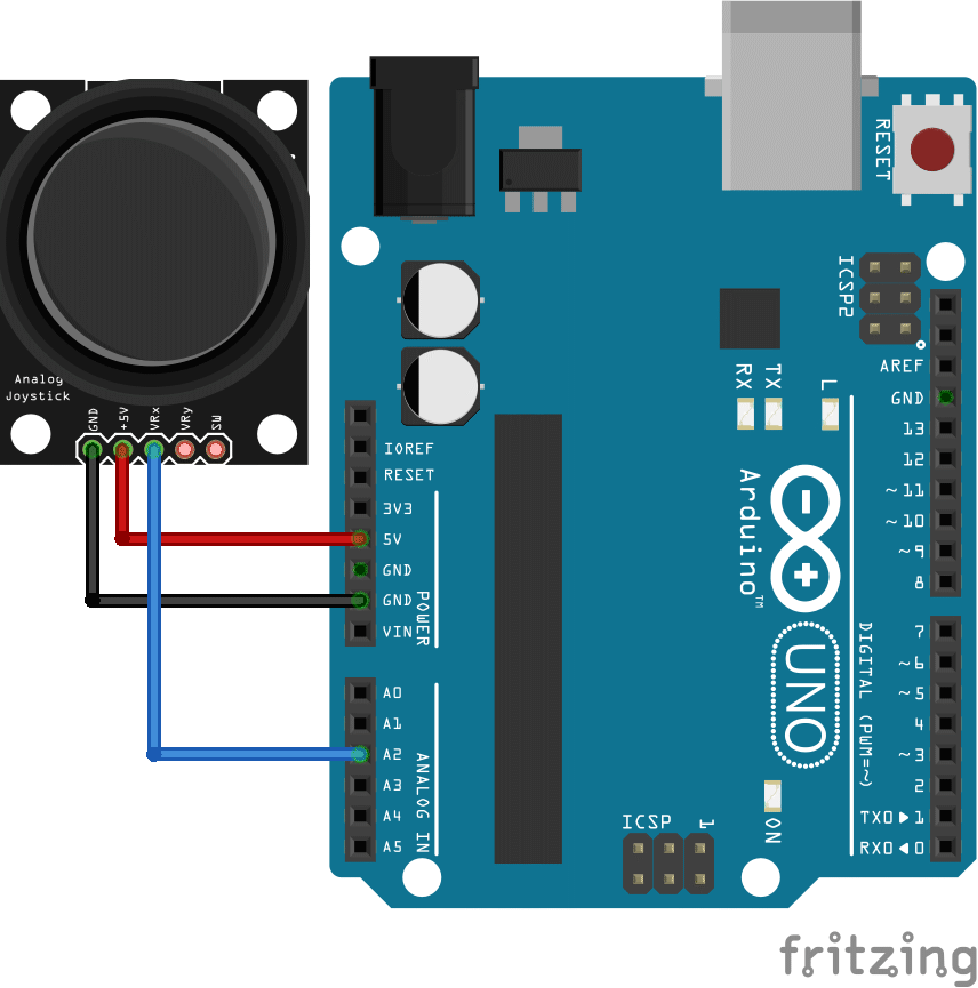
Embed a SystemsConnectionsModel of a simple pendulum:
The input torque is simulated with a joystick which has an equilibrium value of 2.525:
Open a serial connection to the target:
A function to parse the data and a variable to store the data:
Set up a scheduled task to read the values every 0.01 seconds:
Targets (2)
Missing Physical Target (1)
If no hardware is connected, the code cannot be embedded:
The code is not embedded if the connection port is specified as None:
External Programmer (1)
Program the microcontroller using an usbasp programmer:
Properties (1)
Obtain a list of available properties from the MicrocontrollerCodeData object:
Additional Specifications (5)
Create a directory to preserve intermediate files:
Deploy the code and preserve the intermediate files:
By default, intermediate files are deleted:
Specify the path to the compiler:
Typically the generated source code is in C:
Use the Wiring language (used by Arduino sketches):
Generate the source code without compiling and embedding it to the target:
Generalizations & Extensions (1)
Possible Issues (2)
Related Links
Text
Wolfram Research (2019), MicrocontrollerEmbedCode, Wolfram Language function, https://reference.wolfram.com/language/MicrocontrollerKit/ref/MicrocontrollerEmbedCode.html.
CMS
Wolfram Language. 2019. "MicrocontrollerEmbedCode." Wolfram Language & System Documentation Center. Wolfram Research. https://reference.wolfram.com/language/MicrocontrollerKit/ref/MicrocontrollerEmbedCode.html.
APA
Wolfram Language. (2019). MicrocontrollerEmbedCode. Wolfram Language & System Documentation Center. Retrieved from https://reference.wolfram.com/language/MicrocontrollerKit/ref/MicrocontrollerEmbedCode.html