Create headers and footers to display when a notebook is printed.
Using the File Menu...
Create content with page breaks
Use Plot to create a few plots and insert page breaks between them:
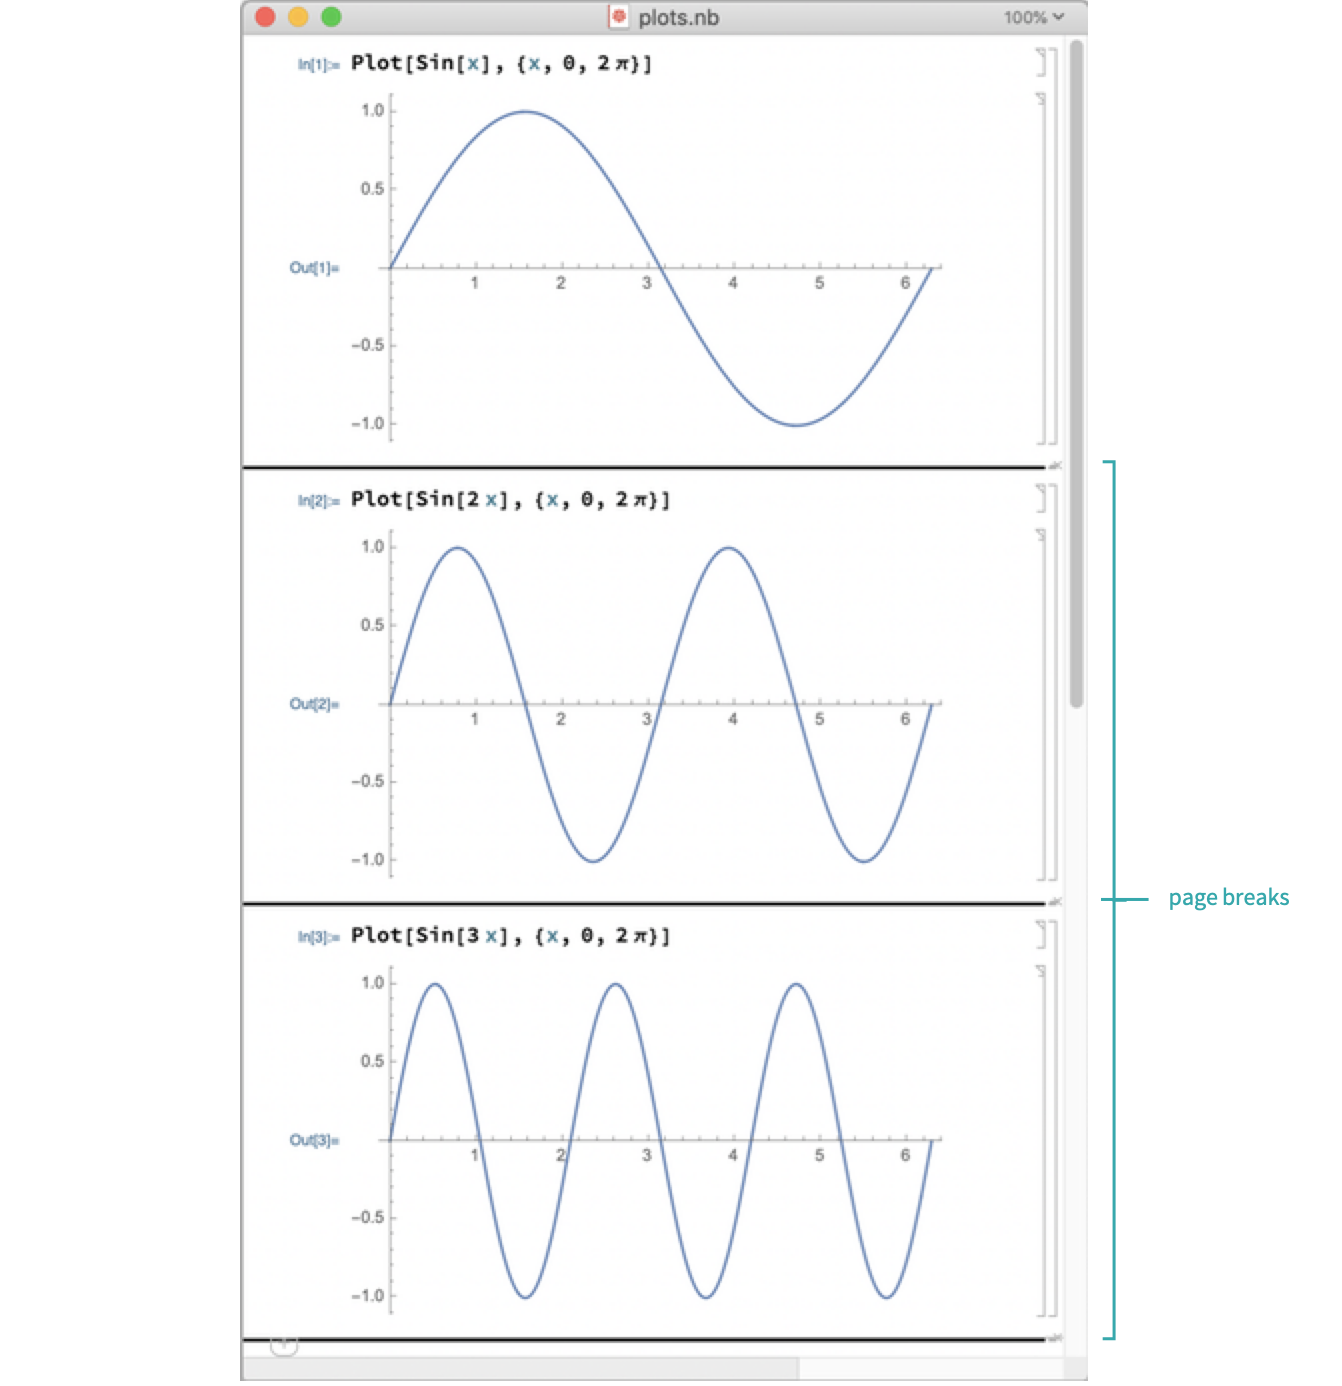
- For more information about inserting page breaks, see the workflow Set Page Breaks for Printing.
Export the notebook to PDF
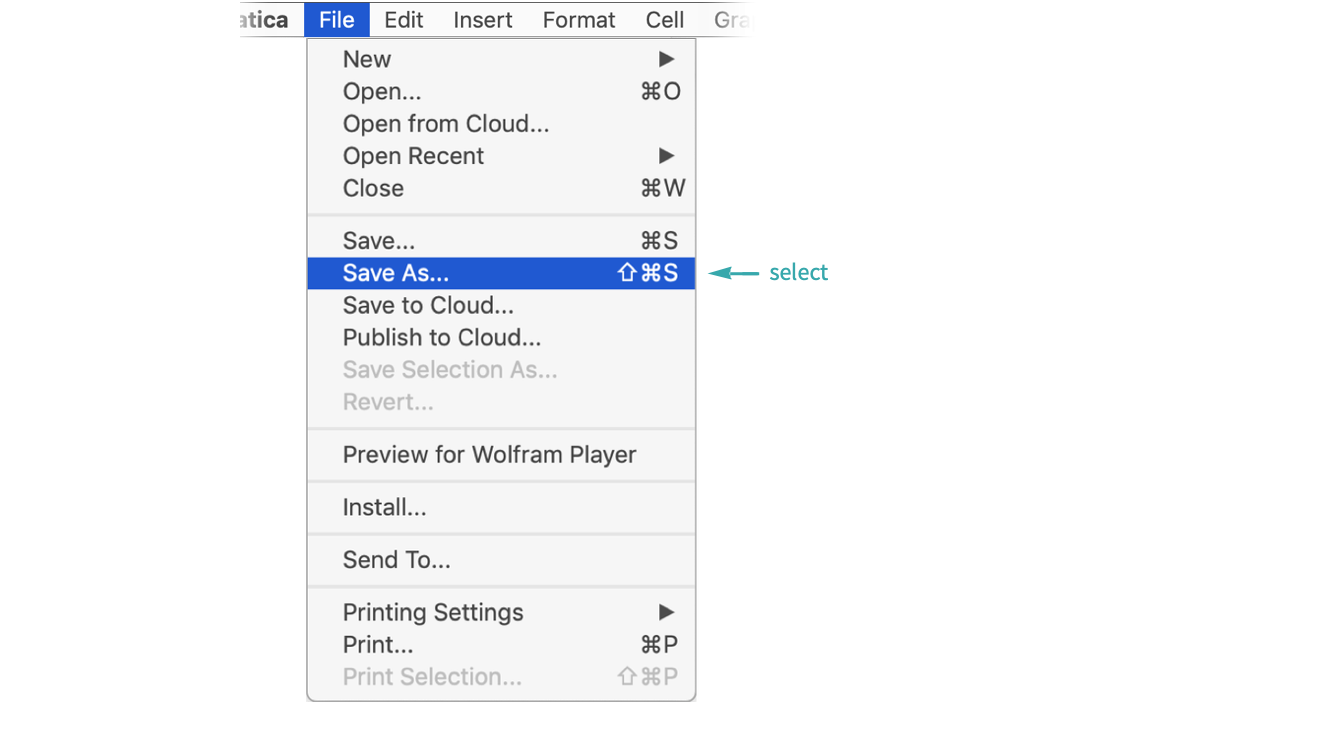
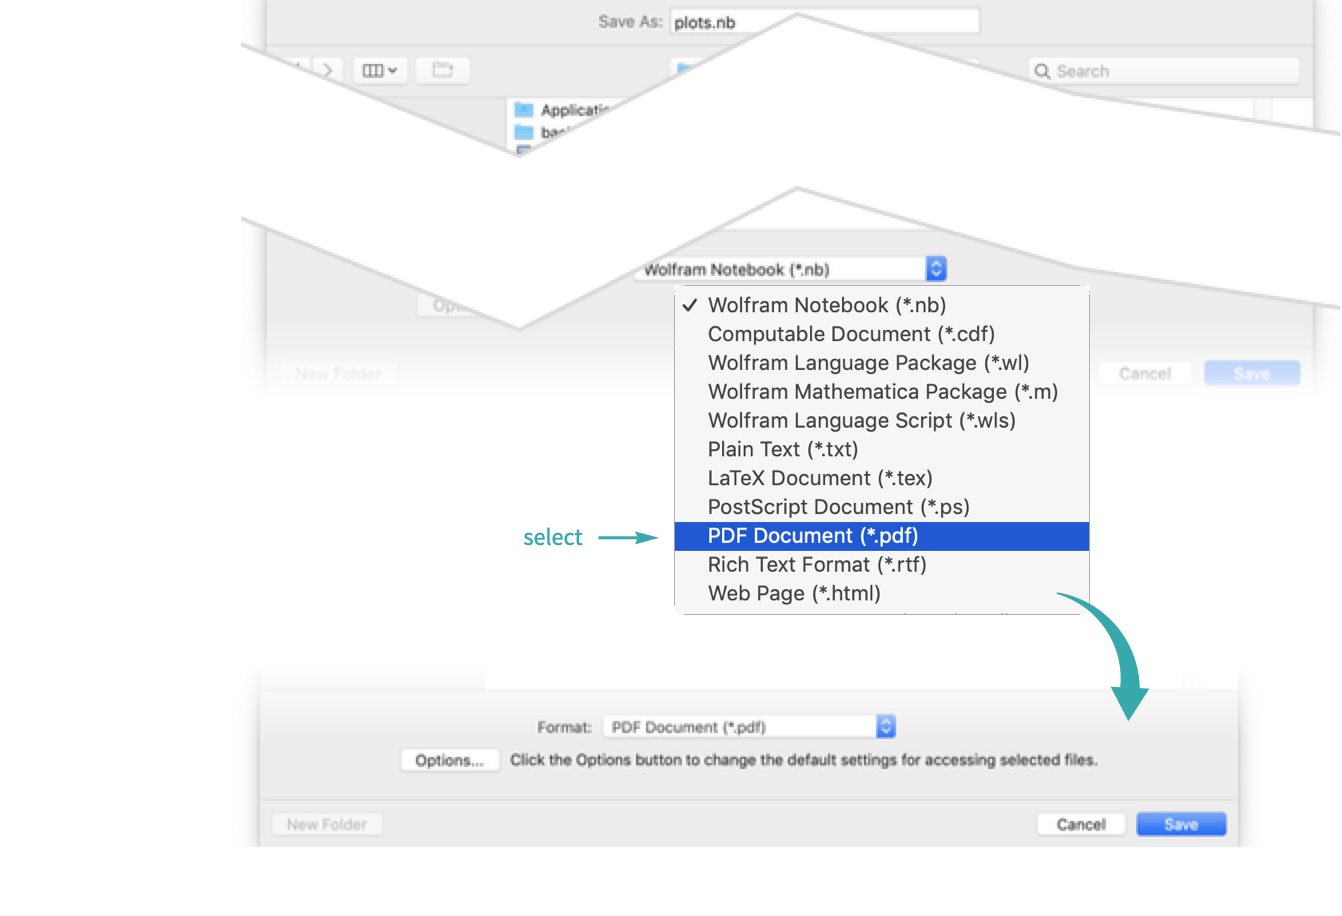
Go to File ▶ Save As (![]() ) and save the notebook as a PDF:
) and save the notebook as a PDF:
Preview the PDF
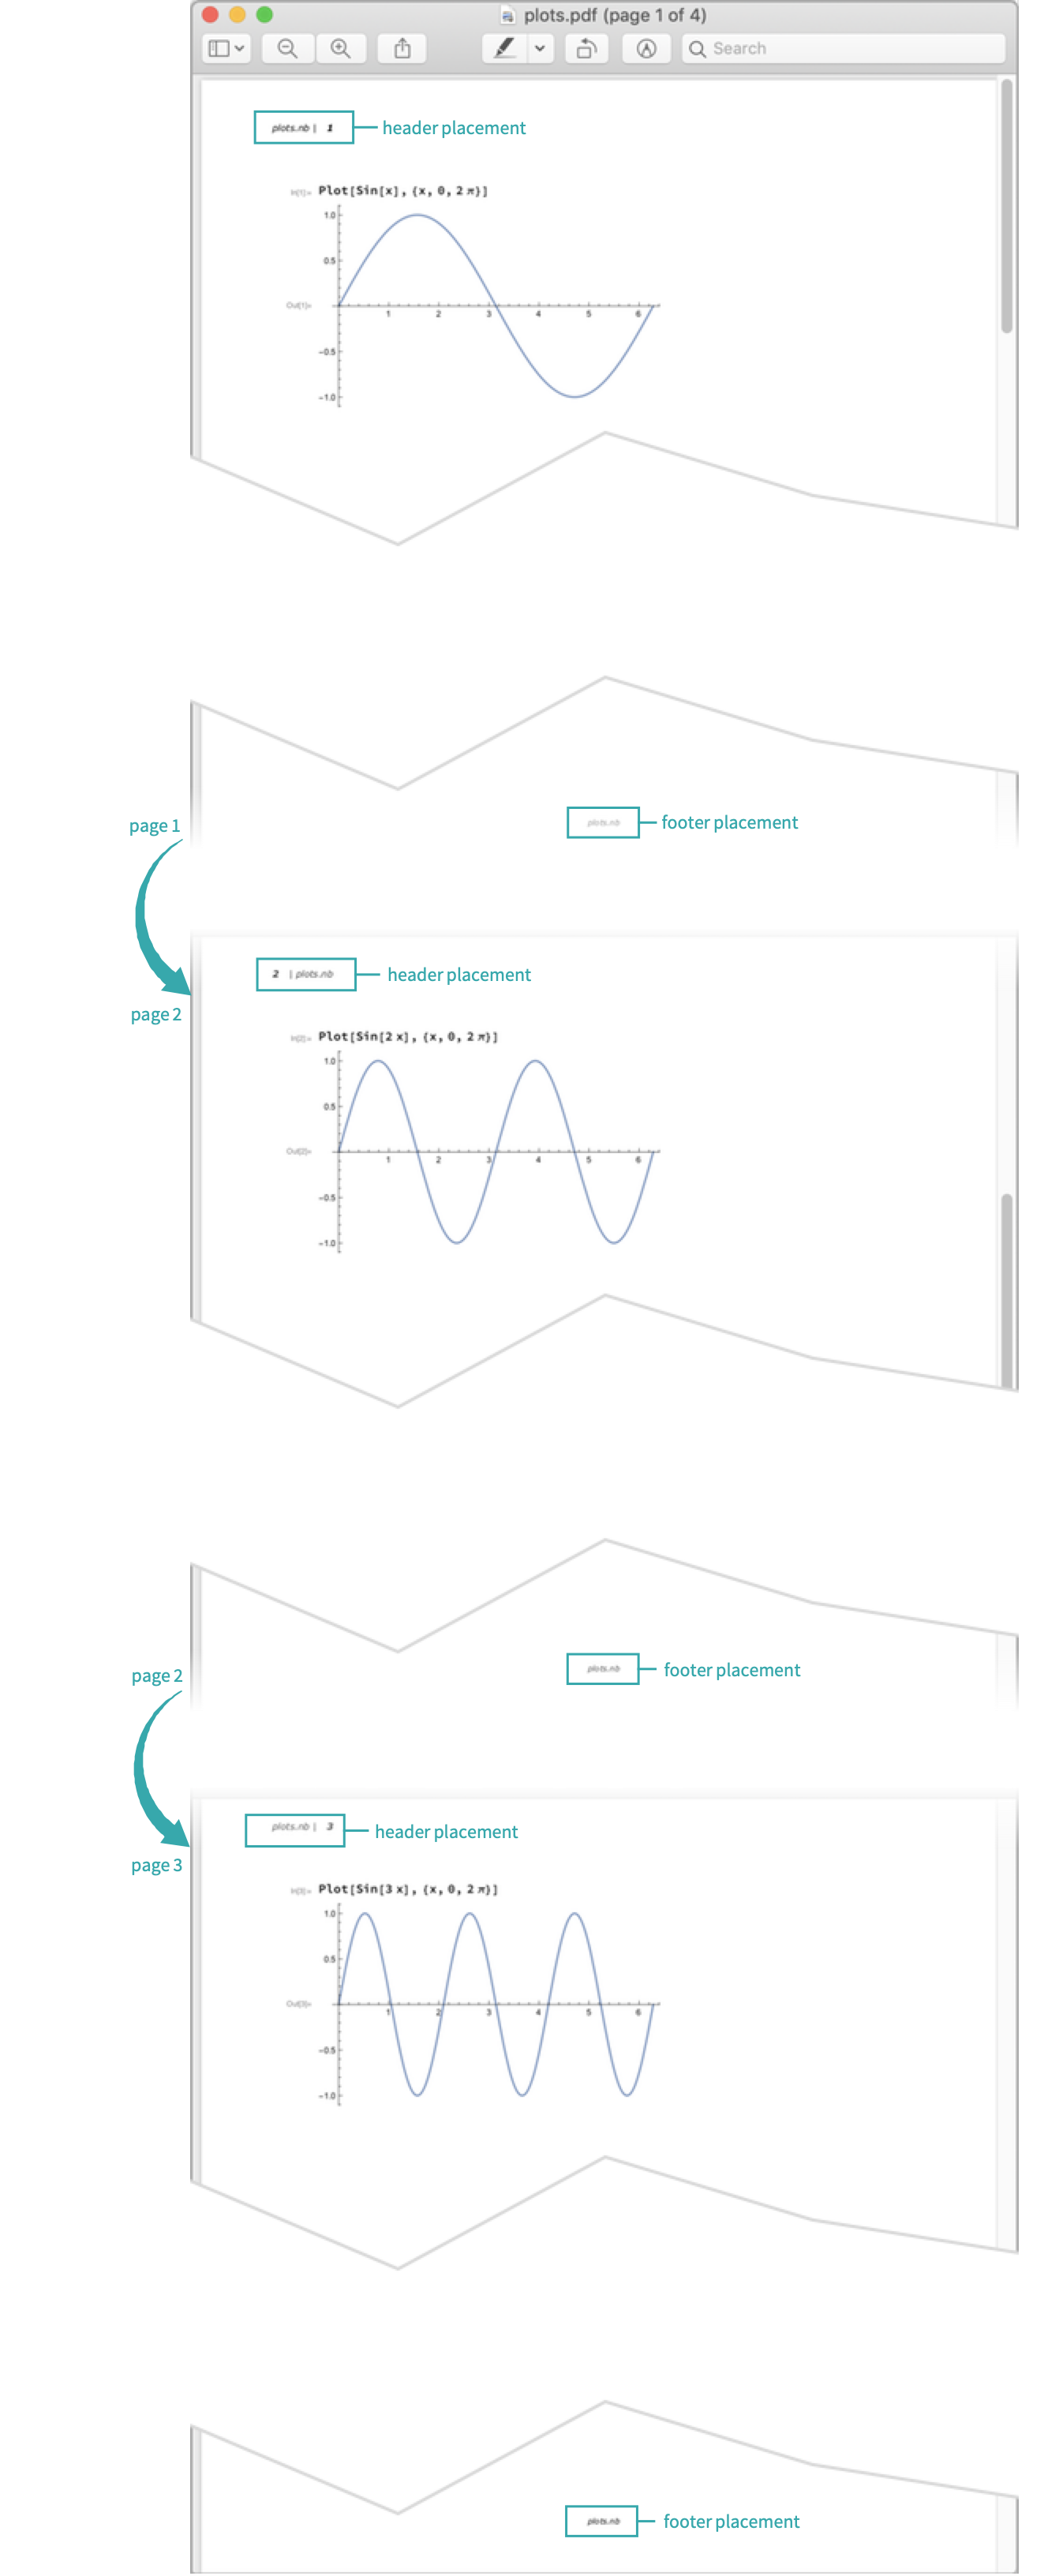
Open the PDF file to examine the default placement of headers and footers:
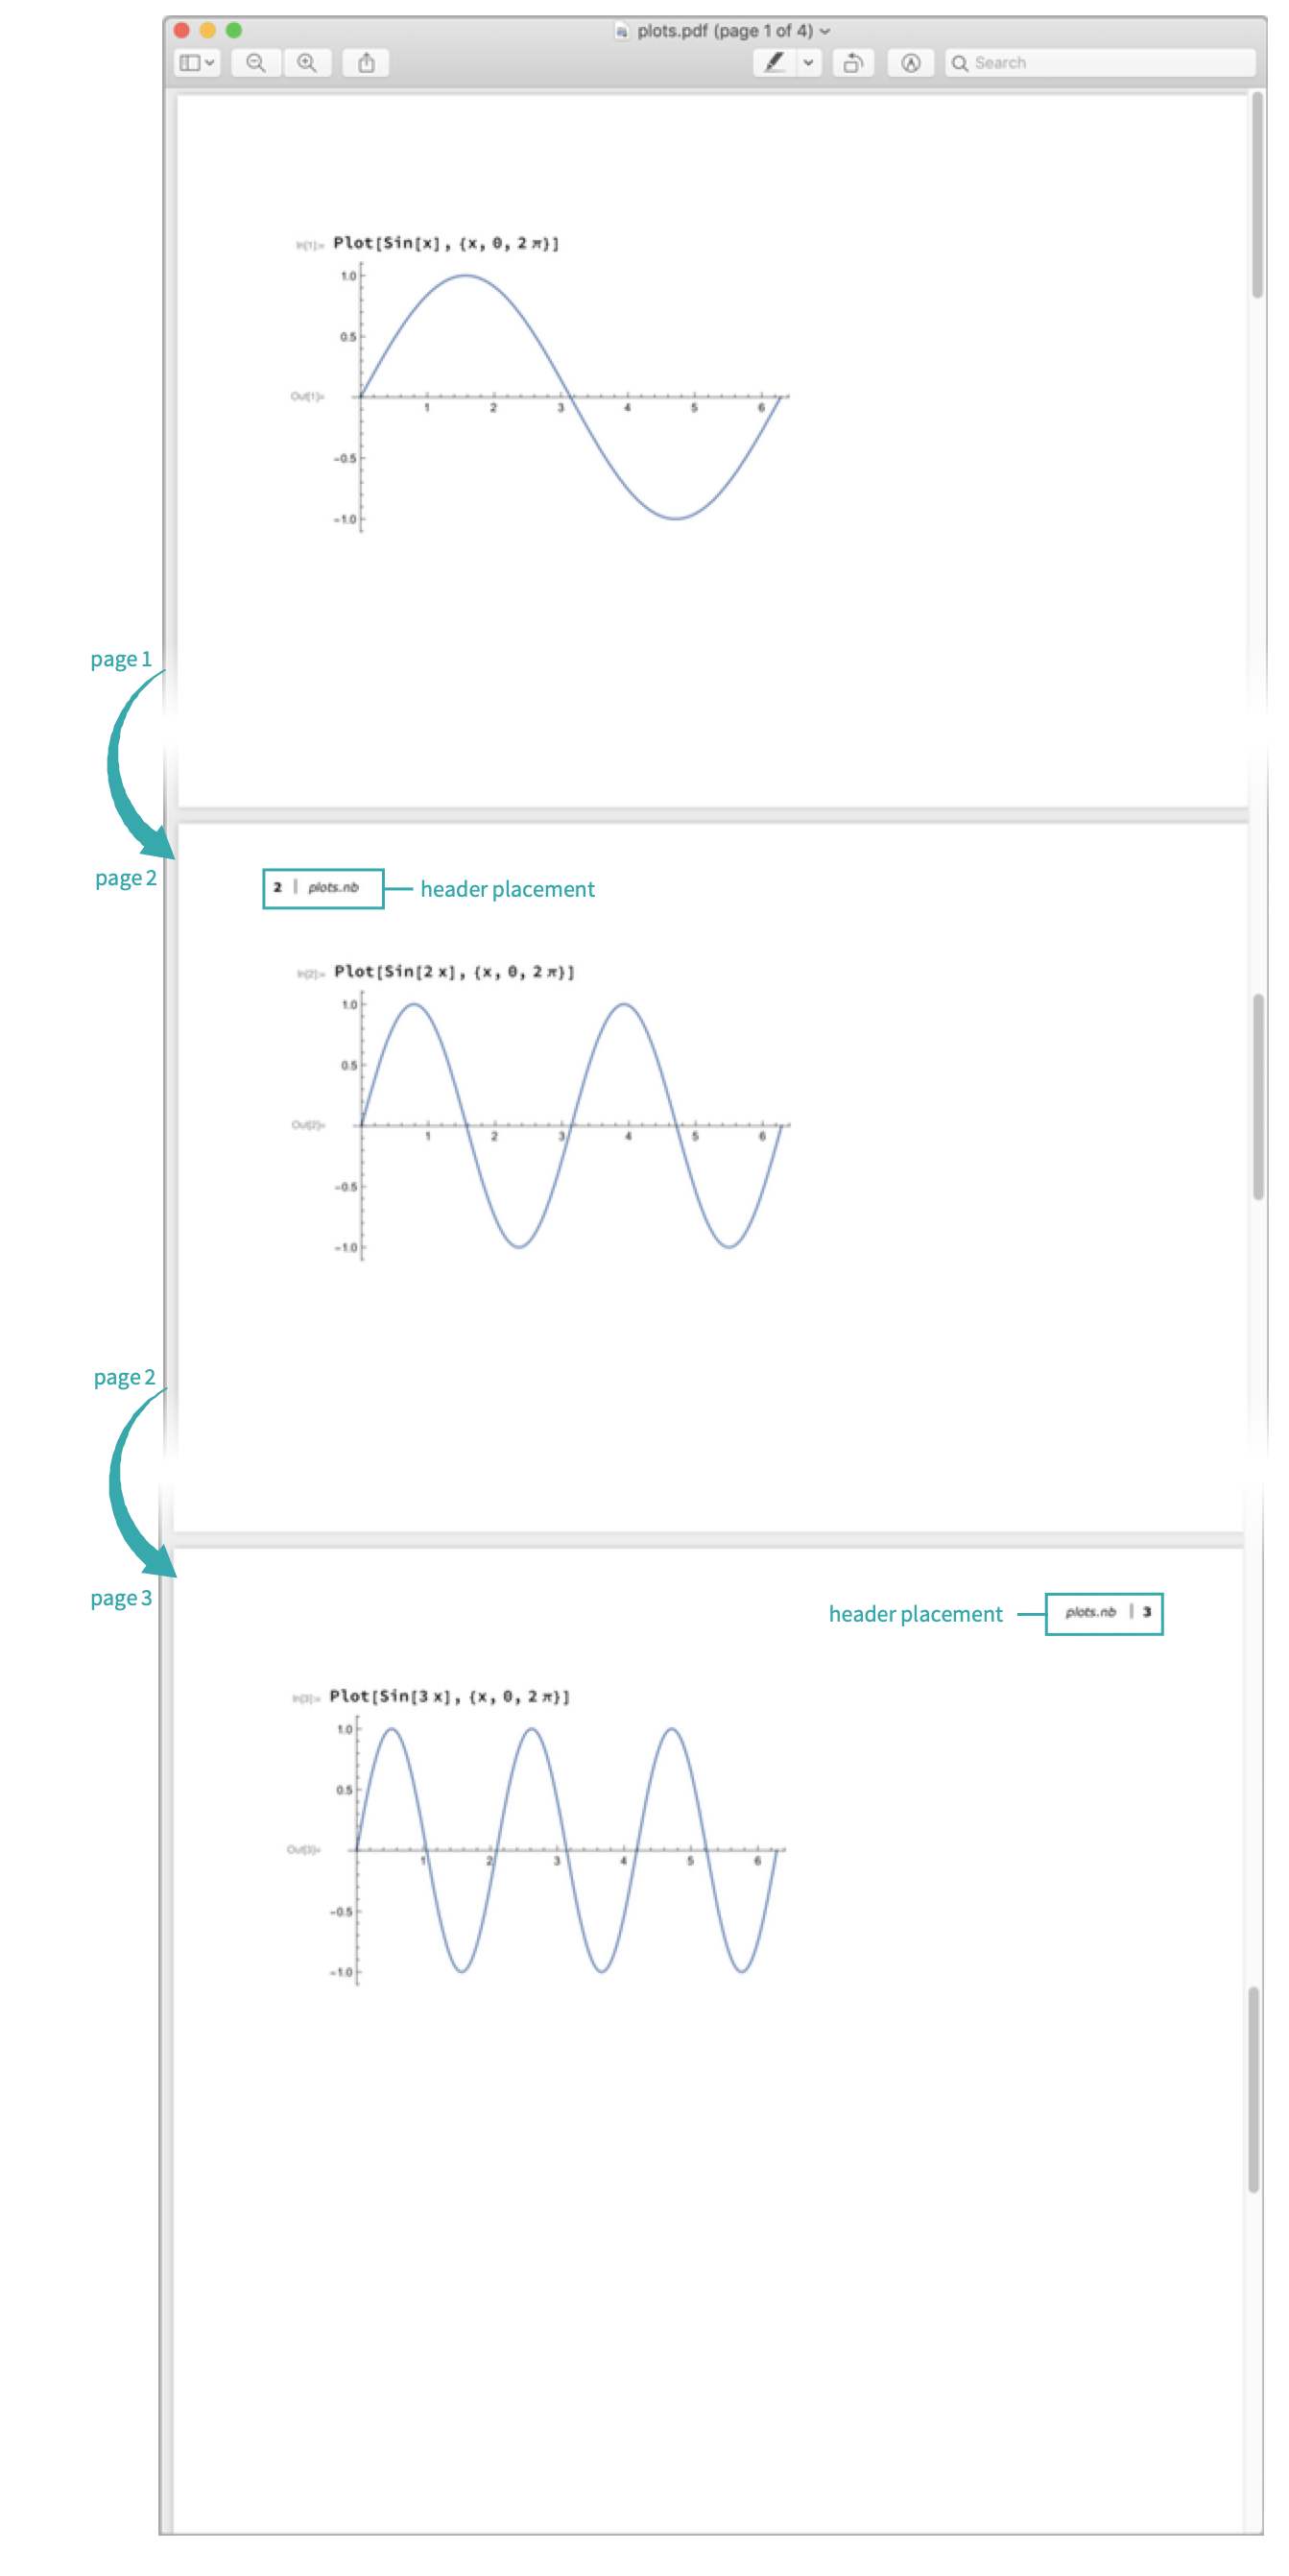
- By default, headers are not placed on the first page, with the subsequent pages alternating between top-left corner and top-right corner to denote left-hand and right-hand pages.
- By default, footers are not used.
Change the headers and footers
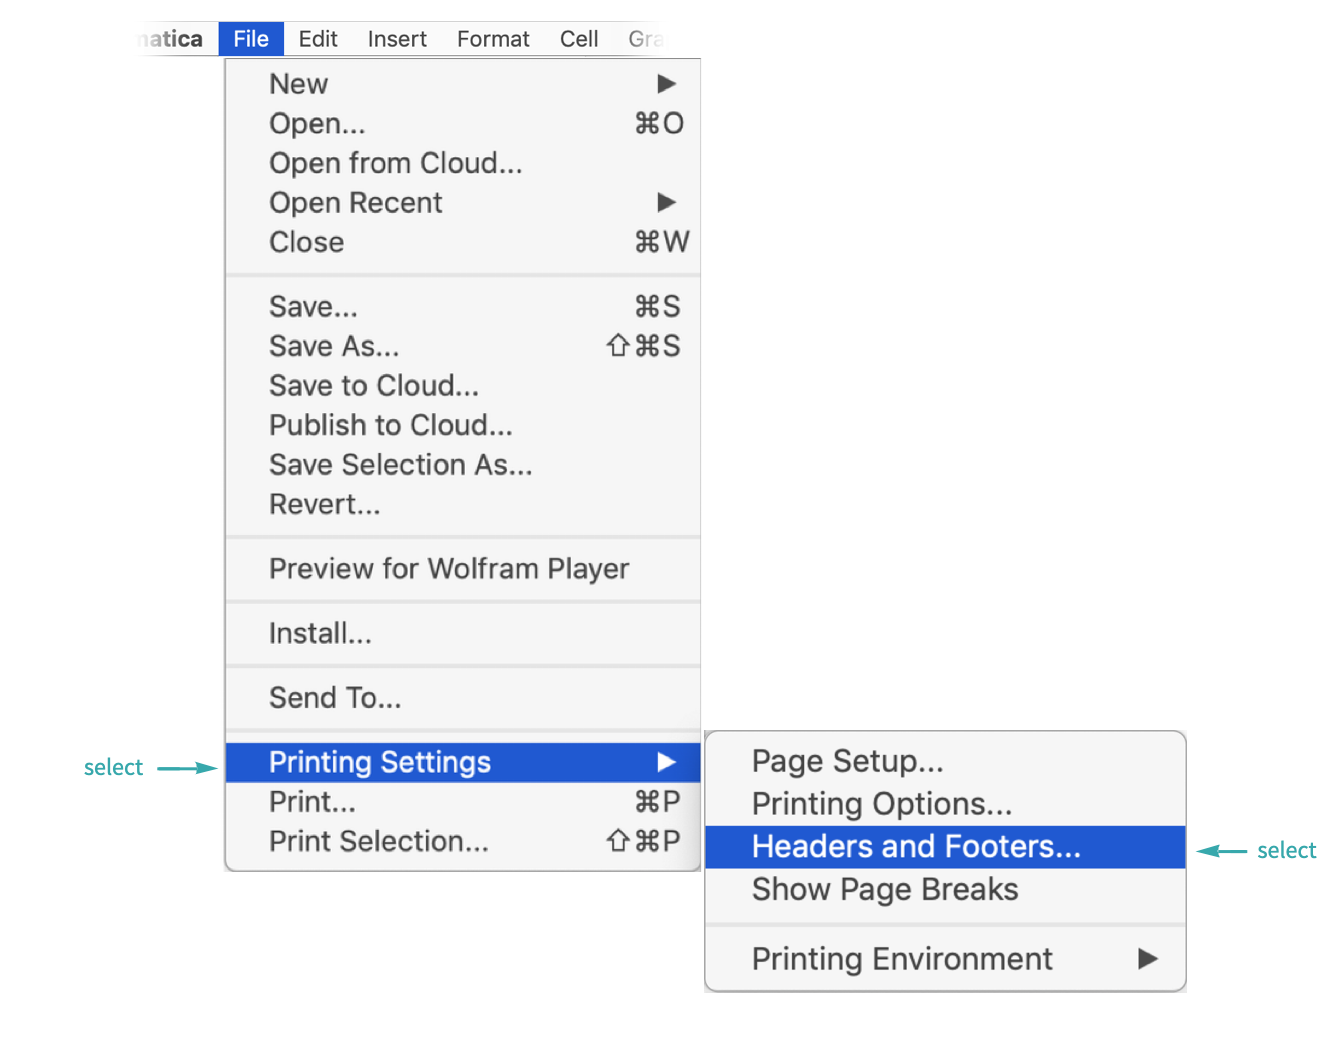
From the menu, select File ▶ Printing Settings ▶ Headers and Footers to open up an interactive interface to change the headers and footers:
For the left-hand pages, add a centered footer that contains the file name and choose to display headers on the first page:
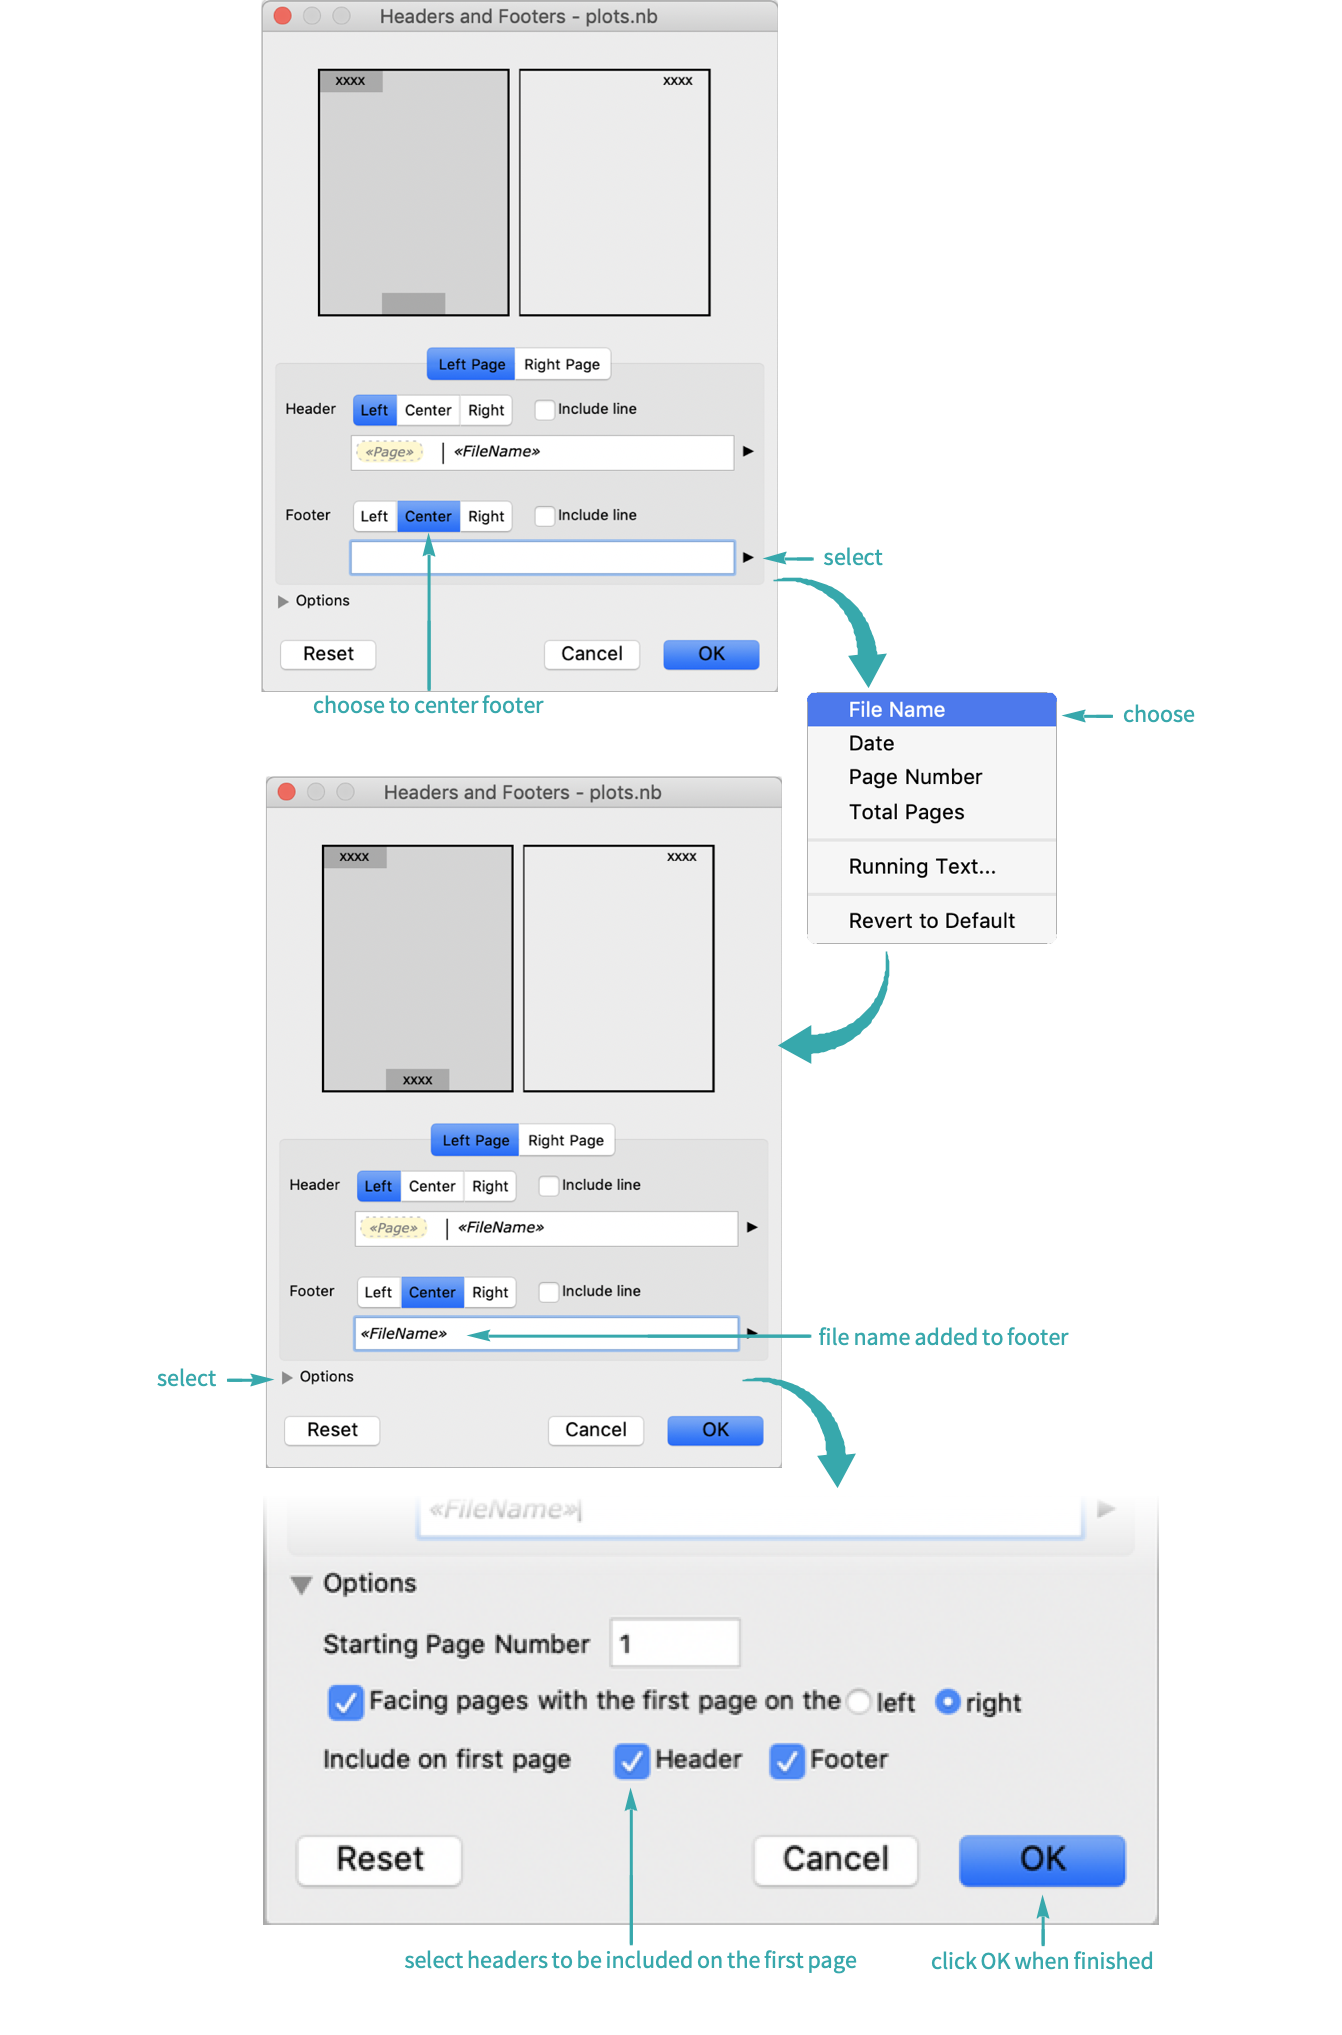
For the right-hand pages, move the header to the top-left corner and add a centered footer that contains the file name:

The headers and footers on both the right-hand pages and left-hand pages should now match.
Preview the PDF with updated settings
Re-export the PDF file and open it to examine the new placement of headers and footers: