Helical Bevel Gear
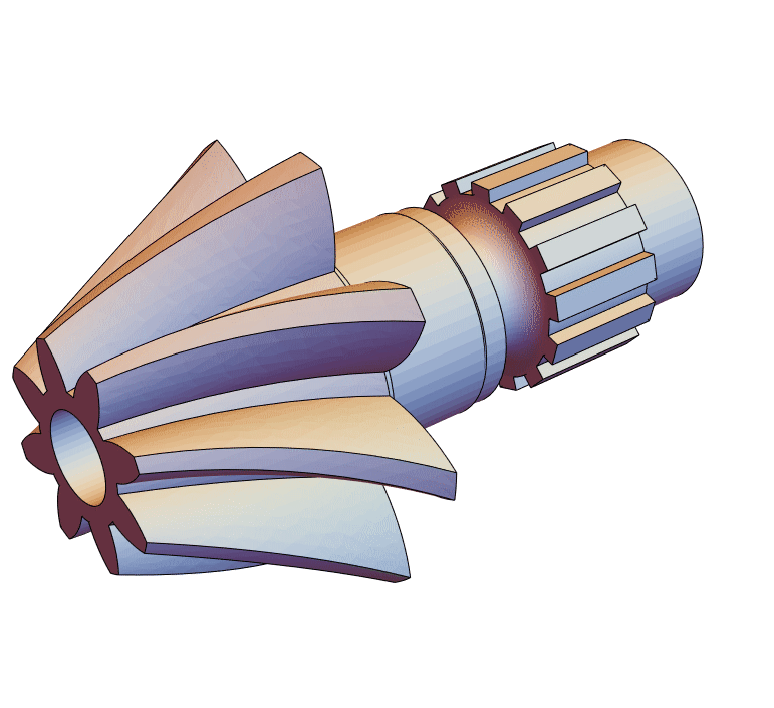
The purpose of this tutorial is to illustrate the usage of the OpenCascadeLink to greate a helical bevel gear. The shape and the procedure of the creation are based on a computer aided design (CAD) tutorial [1].
The creation of the gear will be done in several stages. First, the shaft is created. As a second step the gear will be made. Both the shaft and the gear will be combined. Following that the bosses are added and lastly the gear will be perforated.
Shaft
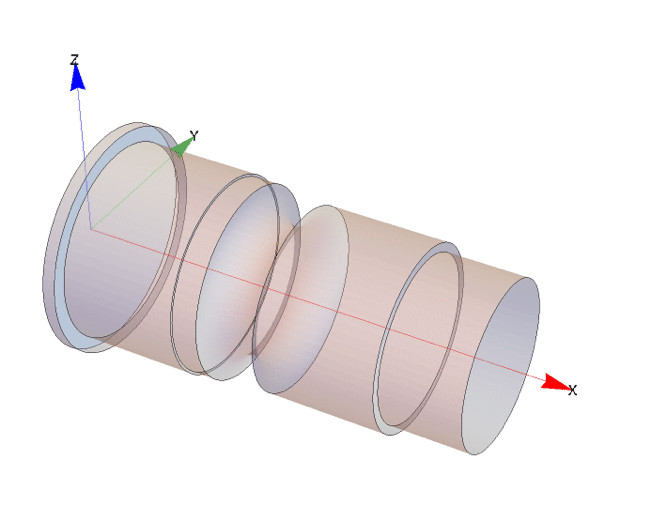
The shaft will be created by specifying a cross section in the X-Z plane. This cross section will then serve as a basis for a solid created from a revolution around the X-axis.
The cross section will consist of three parts, two line segments and a half circle.
Note that the orientation of the segments is important. Should the orientation of the segments in the opposite direction the revolution will result in a solid that specifies the region outside of the shaft. If the orientation of a set of segments be in the opposite direction to what is wanted a trick is to revert the axis of revolution in the exact opposite direction. That will avoid respecifying the segments too.
While OpenCascadeShapeUnion could have been used to combine the segments into a single object, OpenCascadeShapeUnion will return a compound and it’s harder to see what is in a compound.
Next, the cross section will be revolved around a rotation axis along the X-axis.
Now that the cross section is rotated the resulting shape is a shell. That is because the input to the rotation was a wire. However, we would like to have a solid.
As an alternative, one could have used Polygon for the creation of the cross section. These are face type OpenCascade objects and after a revolution would have returned an OpenCascade solid.
To verify that the boundary mesh construction worked as intended, a full element mesh is generated.
The warning message will disappear if the boundary element mesh is created with a smaller "LinearDeflection" value than the default.
Gears
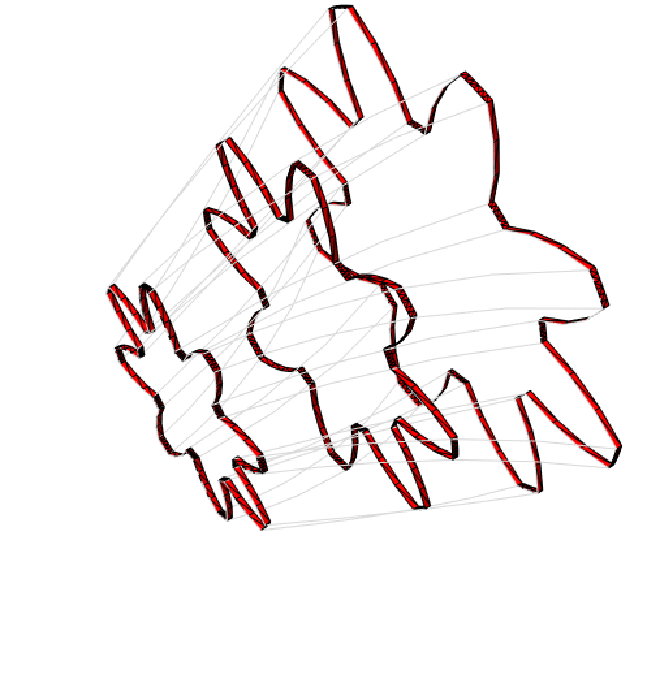
The creation of the gear itself will be done in two steps. First half a gear tooth is modeled in the YZ-plane. The half tooth is constructed by combining three sections of circles. This half tooth is then mirrored at an axis to give a complete tooth. The the single tooth is rotated to make a set of gear teeth in the YZ-plane. Once that is done the gear in the YZ-pane is translated, rotated and scaled in a second plane parallel to the YZ-plane. This procedure is repeated one more time to give a third set of teeth in a third plane again parallel to YZ-plane. The actual gear is then created by extruding through the planes. This created a loft.
Gear teeth
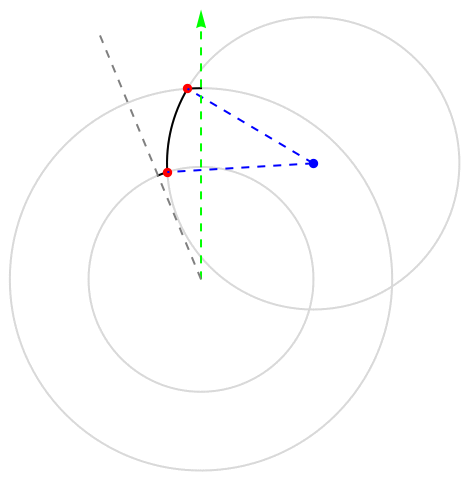
The gear tooth will be created by intersecting three circles and taking parts of their boundaries.
We start by sketching the procedure of the gear tooth generation in 2D.
Next, we proceed to put the above insight into 3D. Since the Wolfram language does not have a Circle primitive that can be used in 3D OpenCascadeLink provides one. The primitive allows one to specify coordinates through which the circle should pass.
Next, the half tooth is mirrored along the Z-axis.
To visualize the created gear profile in 3D we use a trick to give the flat profile an extension in the X-direction. This is purely for visualization and is not needed for the gear constriction.
Make planes
Now, the the gear profile is created that profile can be scaled, rotated and translated to create the gear profiles parallel to each other in the YZ-plane.
To verify that the boundary mesh construction worked as intended, a full element mesh is generated.
Combine
The shaft and the gear are now combined.
To verify that the boundary mesh construction worked as intended, a full element mesh is generated.
Boss
To verify that the boundary mesh construction worked as intended, a full element mesh is generated.
Hollow shaft
To verify that the boundary mesh construction worked as intended, a full element mesh is generated.
Initialization
The following helper function is to visualize circles in 3D space.


