Advanced Web Form Creation
Advanced Web Form Creation
Though FormFunction and FormObject provide a very terse interface for creating simple web forms, this tutorial will cover the methods and options necessary for the creation of more advanced web forms.
FormFunction and FormObject take the option AppearanceRules, which can be used to specify various parts of the form, such as the title and the way the elements are displayed in each field.
Title and Description
You can use AppearanceRules with "Title" and "Description" to add a title and a subtitle to your form.
CloudDeploy[FormFunction["city" -> "City", #city&, AppearanceRules -> <|"Title" -> "What's your city", "Description" -> "This form allows you to input your city"|>]]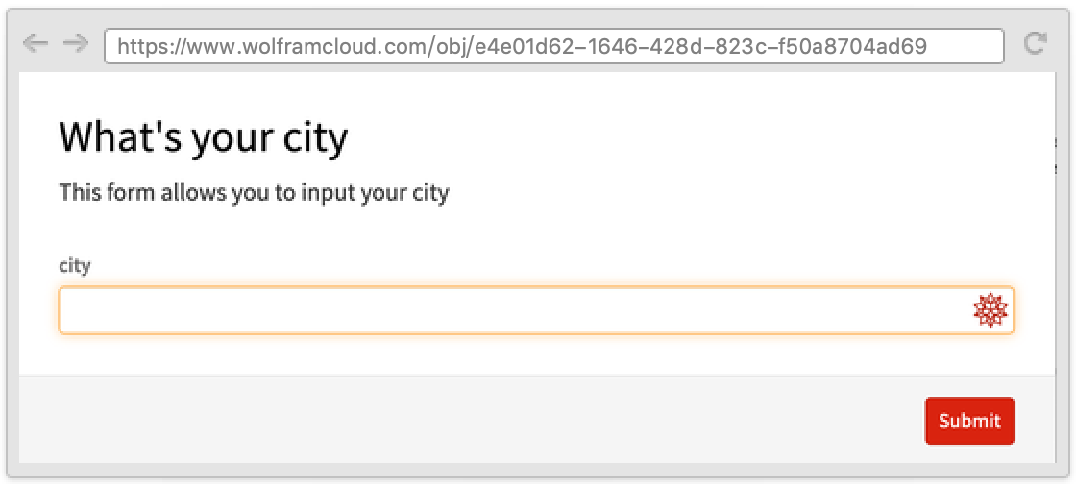
SubmitLabel and NextLabel
CloudDeploy[FormFunction["city" -> "City", #city&, AppearanceRules -> <|"SubmitLabel" -> "Go!"|>]]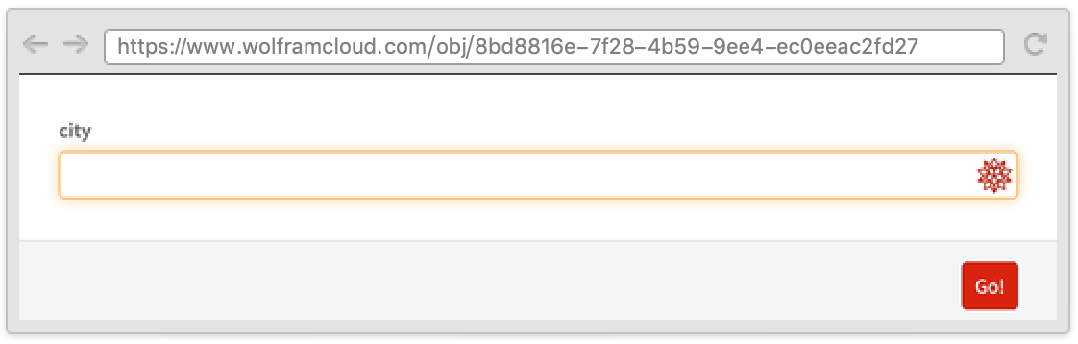
Similarly, "NextLabel" can be used to customize the text in all the fields except for the last in a multipage form.
Non-textual Values
Most of the fields in AppearanceRules do not need to be strings.
CloudDeploy[FormFunction["animal" -> "Animal", #animal&, AppearanceRules -> <|"SubmitLabel" -> [image], "Title" -> Import["ExampleData/turtle.jpg"], "Description" -> Style["What is this animal?", Blue] |>]]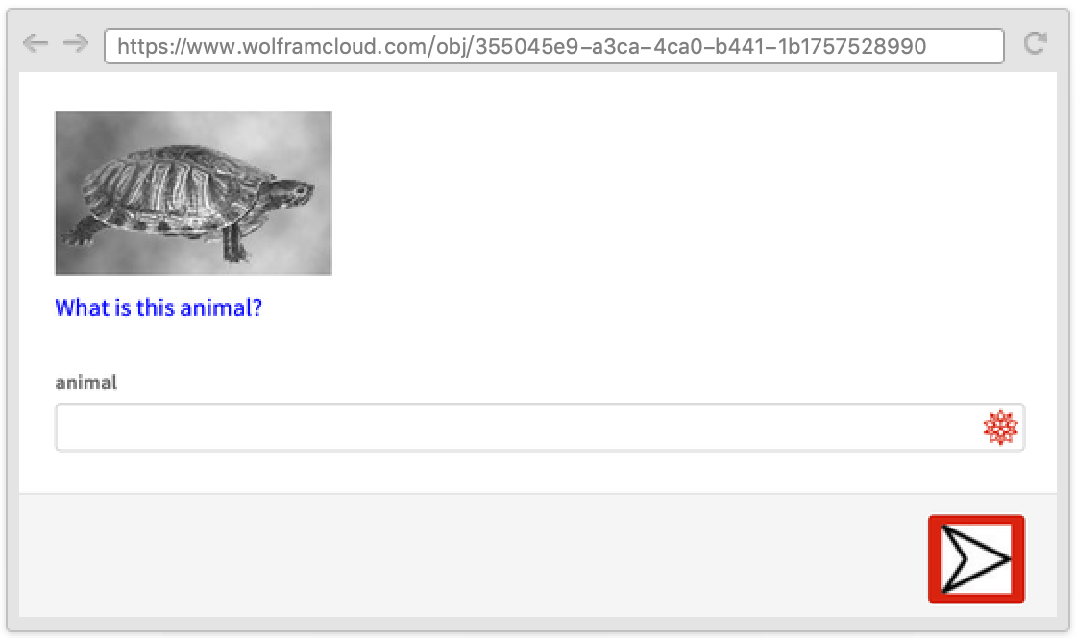
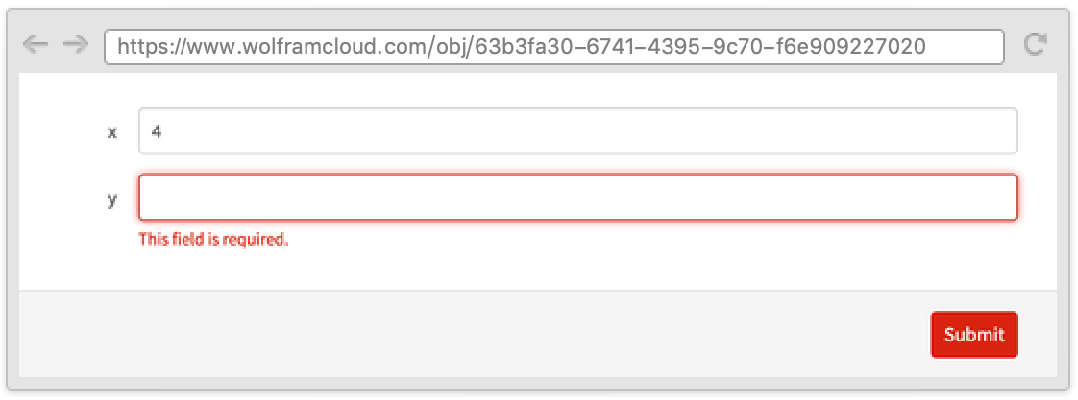
RequiredFieldIndicator
CloudDeploy[FormFunction[{"required" -> "Number", "optional" -> "Number" -> 0}, Identity, AppearanceRules -> <|"RequiredFieldIndicator" -> Function[Style[#, Red]] |>]]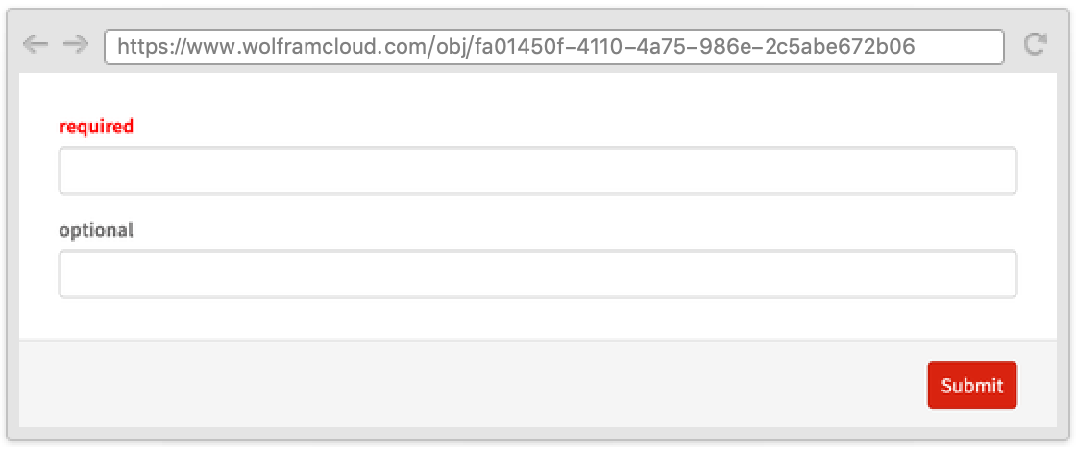
ItemLayout
"ItemLayout" can be used to decide the way the elements are displayed in a grid. Empty rows and columns are automatically elided. Item layouts are responsive, meaning that layouts adapt to the width of your browser window. Specifically, item layouts may look different in mobile web browsers.
CloudDeploy[FormFunction[{"x" -> <|"Help" -> "type here"|>, "y" -> "Integer"}, Identity, AppearanceRules -> <|"ItemLayout" -> "Horizontal" |>]["x" -> "text"]]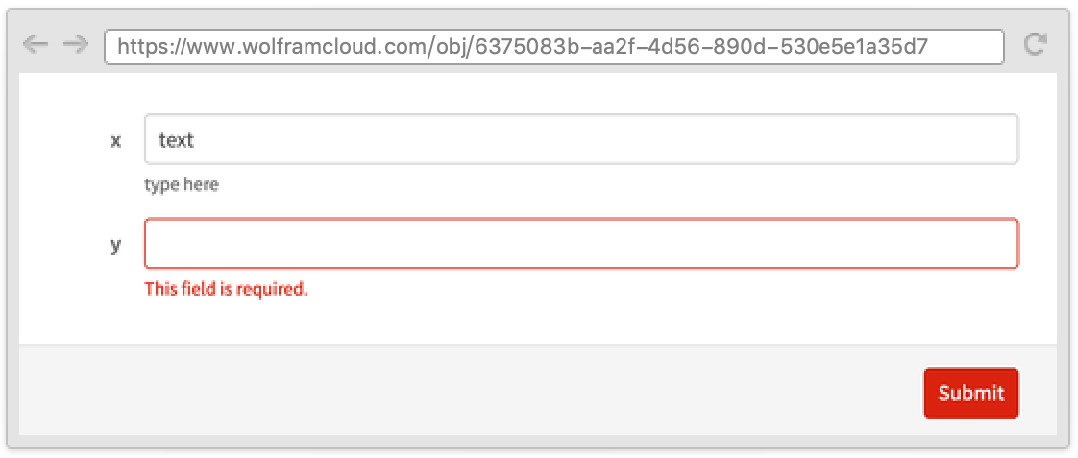
CloudDeploy[FormFunction[{"x" -> <|"Help" -> "type here"|>, "y" -> "Integer"}, Identity, AppearanceRules -> <|"ItemLayout" -> "Inline" |>]["x" -> "text"]]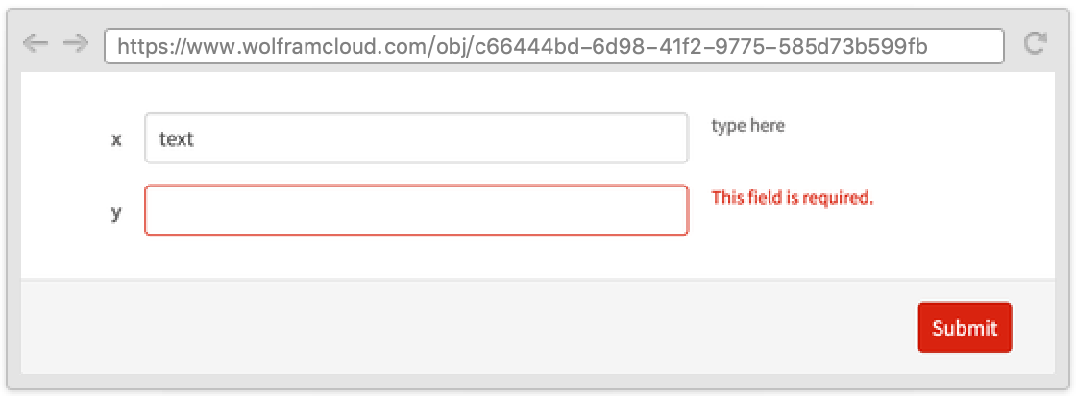
CloudDeploy[FormFunction[{"x" -> <|"Help" -> "type here"|>, "y" -> "Integer"}, Identity, AppearanceRules -> <|"ItemLayout" -> "Vertical" |>]["x" -> "text"]]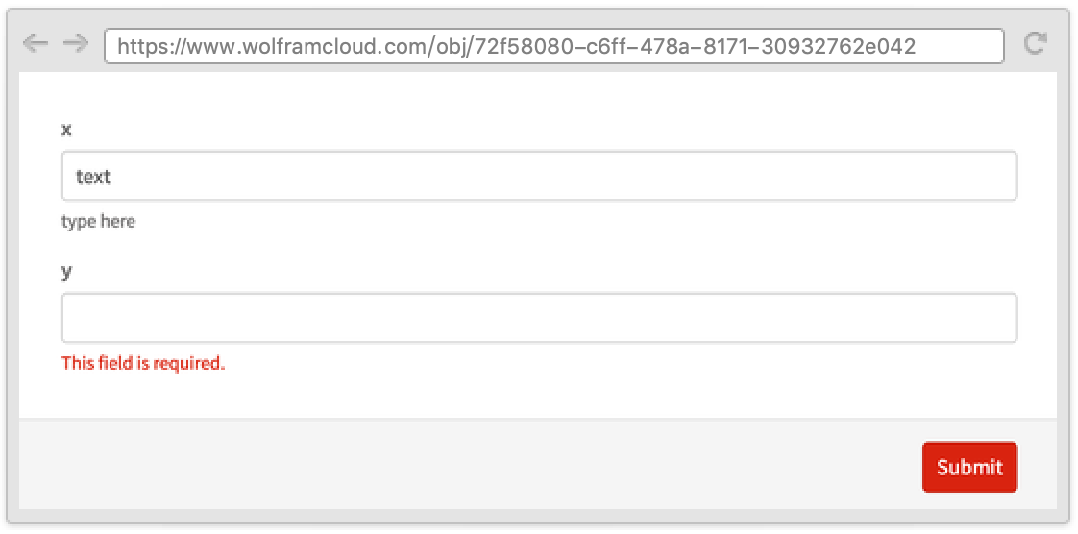
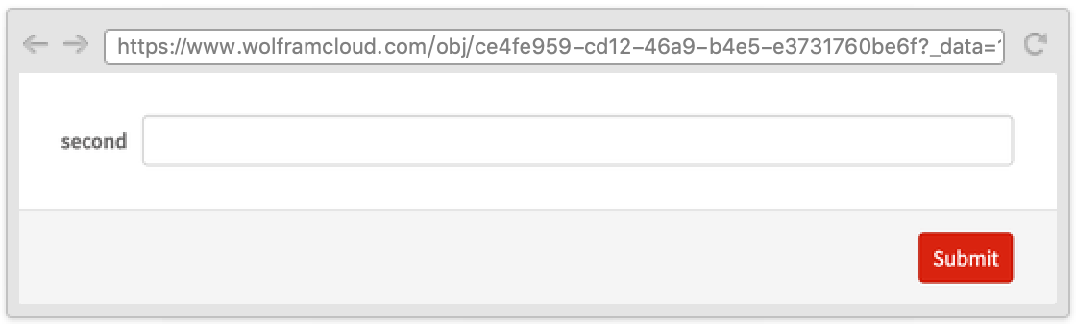
CloudDeploy[FormFunction[{{"first" -> "Integer"}, {"second" -> "Integer"}}, Identity]]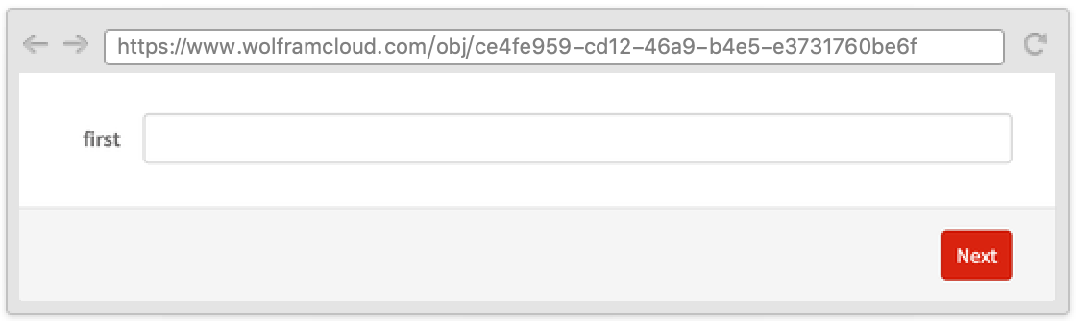
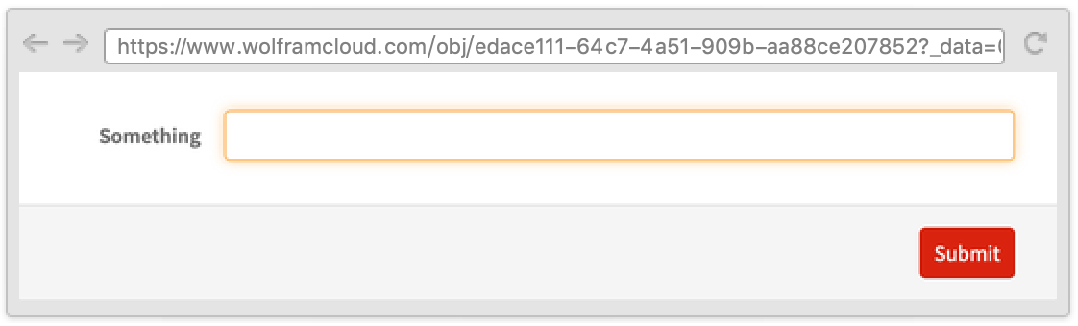
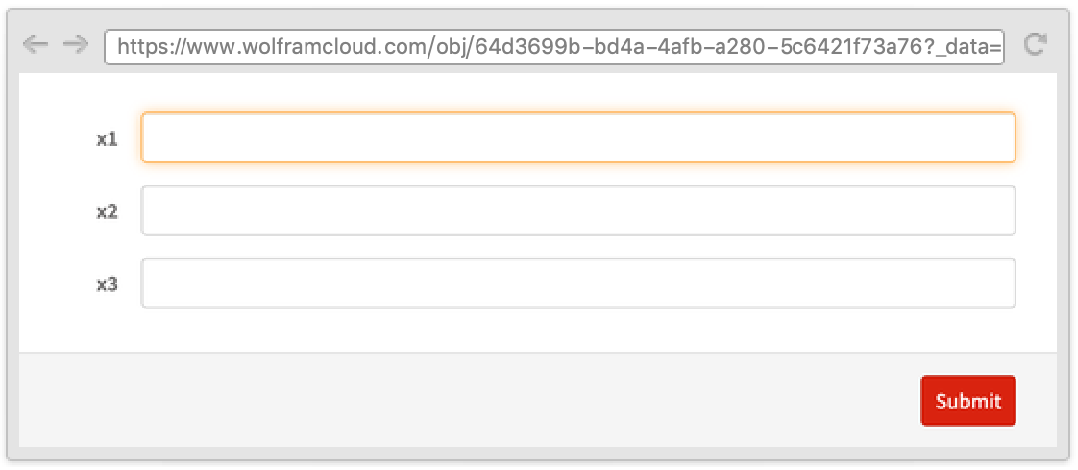
All pages except the first can be specified as pure functions; doing so will let you have new pages that depend on the old ones.
CloudDeploy[FormFunction[{{"label" -> "String"}, {{"second", #label } -> "Integer"}&}, Identity]]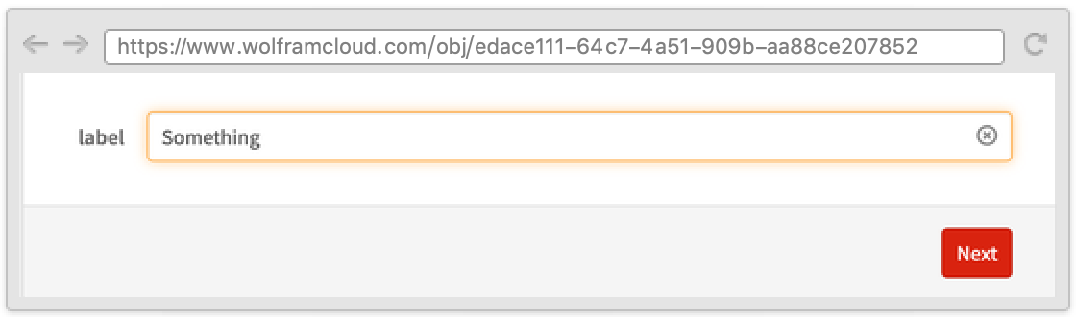
CloudDeploy[FormFunction[{{"number" -> "Integer"}, Table["x" <> ToString[i] -> "String", {i, #number}]&}, Identity]]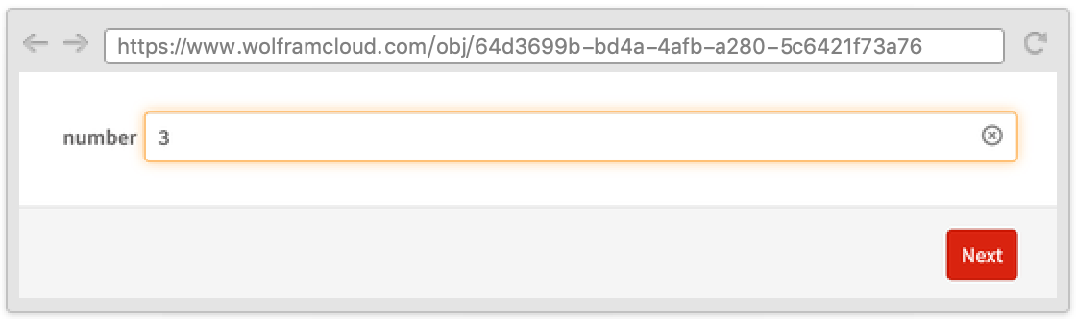
Note that fields in different pages can have the same key. If this happens, the newest value will overwrite the old.
Sometimes it is useful to define a form where one field depends on another and where both appear on the same page. This can be done by using the Wolfram Language templating language, with symbols such as TemplateSlot.
CloudDeploy[FormFunction[{"state" -> "USState", "county" -> TemplateSlot["state"][EntityProperty["AdministrativeDivision", "Subdivisions"]]}, Identity]]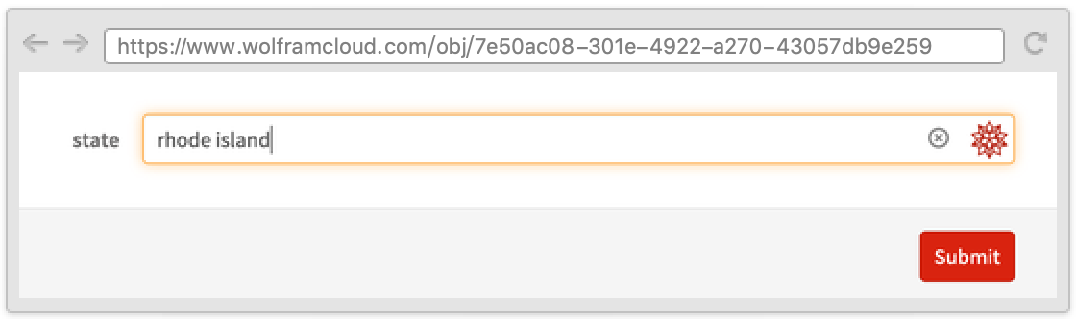
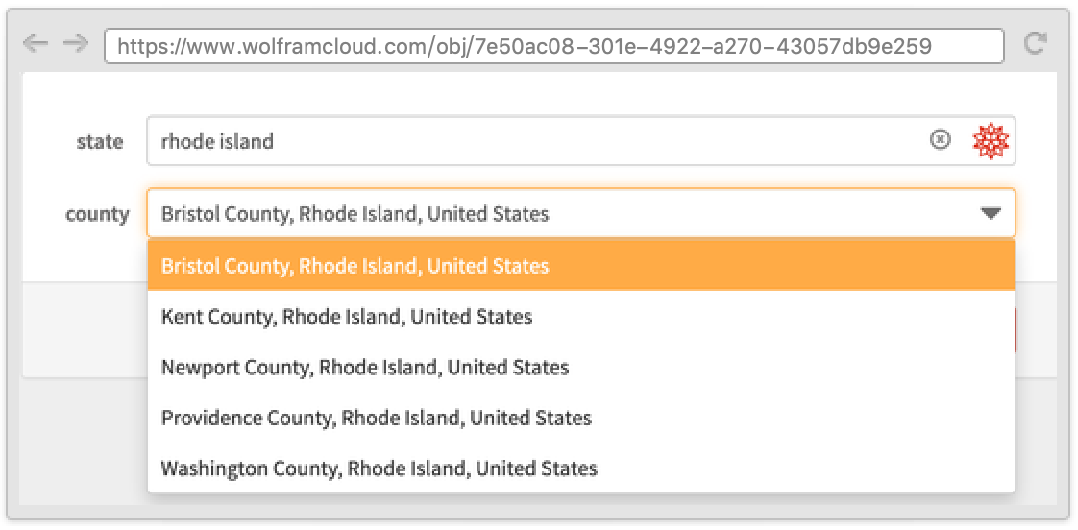
Fields that depend on other fields are automatically hidden until there is enough information to display them, while fields that have other fields depending on them automatically submit when filled in.
You can force a field to automatically submit the whole form when it is filled in by wrapping it with AutoSubmitting.
CloudDeploy[FormFunction[{"x" -> AutoSubmitting["Integer"], "y" -> "Integer"}, Identity]]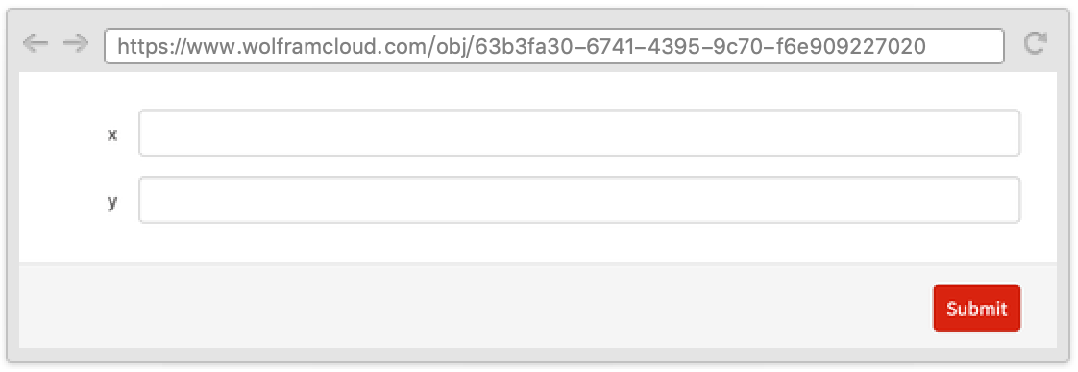
Note that when selecting the second field after typing in the first, the whole form is submitted, resulting in a failure message below the second field.
Sometimes it is useful to have a variable number of fields in a form. Use RepeatingElement to repeat a field.
CloudDeploy[FormFunction["field" -> RepeatingElement["String", {2, {1, 5}}]]]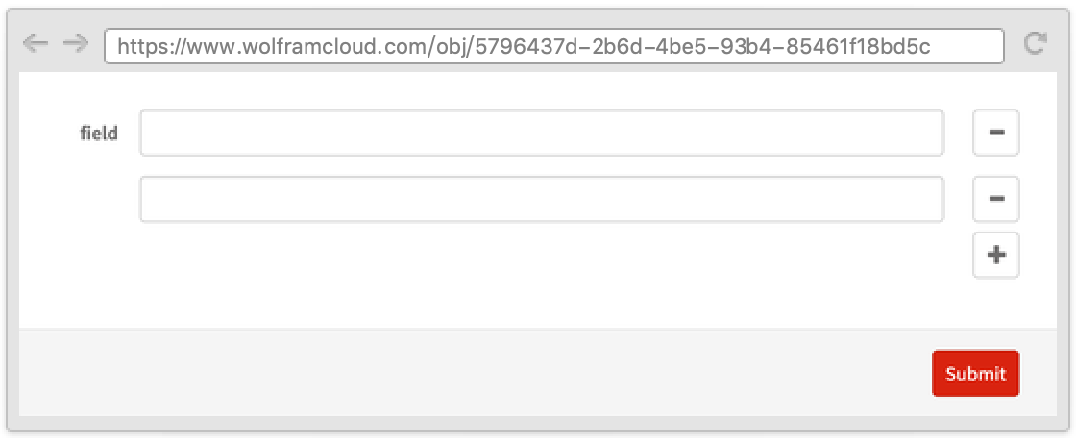
Using the second argument of RepeatingElement, you can make a subfield depend on its index.
CloudDeploy[FormFunction["number of occupants" -> RepeatingElement[<|"Interpreter" -> "Integer", "Label" :> "room " <> ToString[i]|>, {{i, 2}, {1, 5}}]]]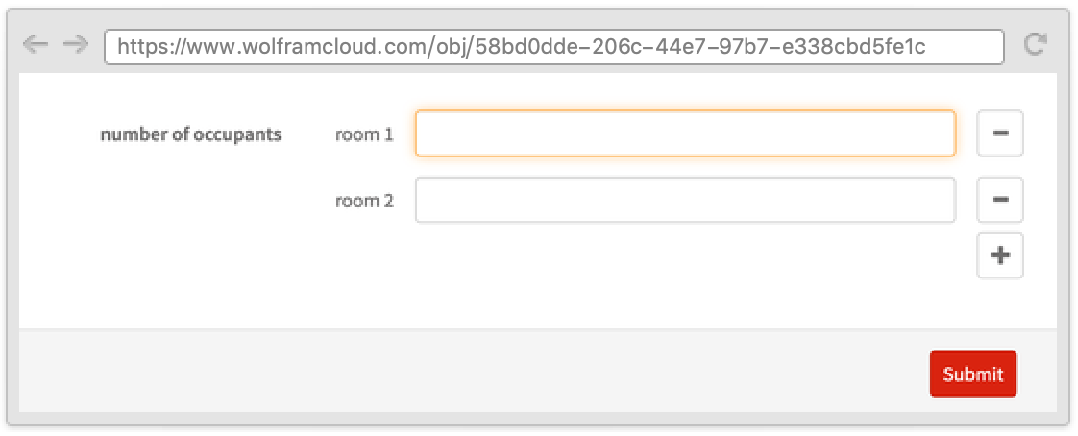
CloudDeploy[FormFunction["names" -> RepeatingElement[CompoundElement[<|"first" -> "String", "last" -> "String"|>]]]]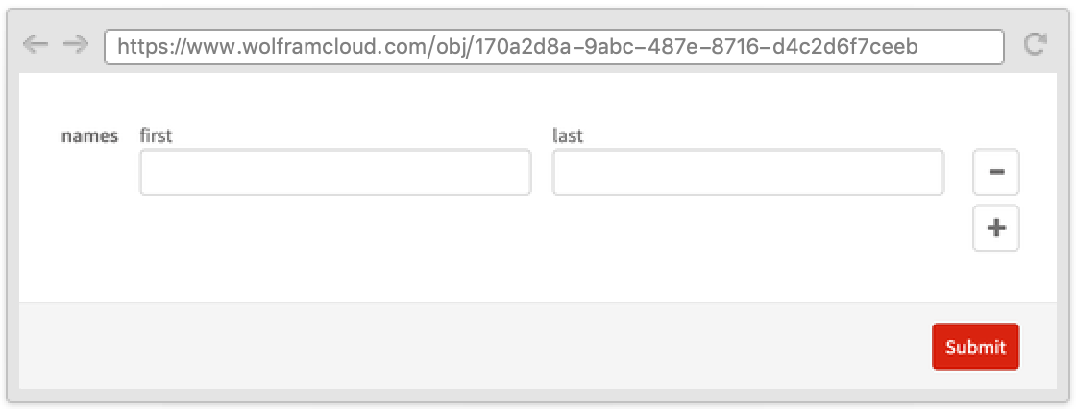
The AppearanceRules options "AddLabel" and "DeleteLabel" can be used to customize the labels of the buttons in a RepeatingElement.
CloudDeploy[FormFunction["field" -> RepeatingElement["String"], AppearanceRules -> <|"AddLabel" -> "Add", "DeleteLabel" -> "Delete"|>]]