Creating a New Component
This tutorial illustrates how to create and reuse a custom component. A chain pendulum can be seen as a concatenation of chain links, where each chain link consists of a body rotating around one end. We will show how to create a chain link component that will be reused in the chain pendulum model.
MODELS USED IN THIS TUTORIAL |
| ChainLink ChainPendulum |
Chain Link Component
The components needed to build the chain link are available in the Modelica Standard Library included in System Modeler. The chain link is inspired by the pendulum example in the Modelica.Mechanics.MultiBody library and consists of a body rotating around a revolute joint. To add friction to the rotation, a damper is connected to the revolute joint.
To build the model of a chain link, we need to create a new model, find the appropriate components, drag and drop the components onto the diagram area, and connect the components using the Connection Line Tool. These first steps are explained in detail in this tutorial. Furthermore, for the model to be used as a component, it also needs connector interfaces to permit connection to other components. We will show how the connector interfaces are easily added with the Connection Line Tool. Parameters are also added to the component to make it more flexible.
We begin by creating a new model that we call ChainLink. The components needed are a revolute joint Revolute located in Modelica.Mechanics.MultiBody.Joints, a body BodyBox located in Modelica.Mechanics.MultiBody.Parts, and a rotational damper Damper located in Modelica.Mechanics.Rotational.Components. To add a component to the ChainLink model, drag it from the Class Browser and drop it on the Diagram View of the class window. The model is depicted below.
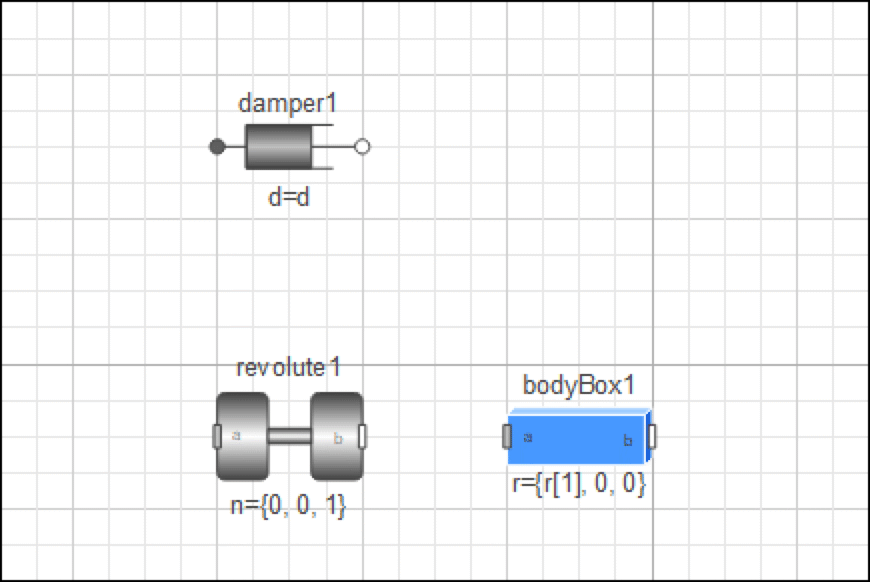
Diagram View of ChainLink model.
In order to be able to connect a rotational damper to the revolute joint, we need to set a parameter of the component revolute1. To modify parameters, select the revolute1 component and view the Parameters in the General tab. Change the parameter useAxisFlange from false to true.
Once you have added the three components, you need to connect them with each other. Components are connected using the Connection Line Tool.
![]()
The Connection Line Tool in the toolbar of Model Center.
Only connectors with similar properties can be connected. This rule is supported by the Connection Line Tool. If the user tries to connect two incompatible connectors, the connection line will be disabled, as seen in the screen shot below.
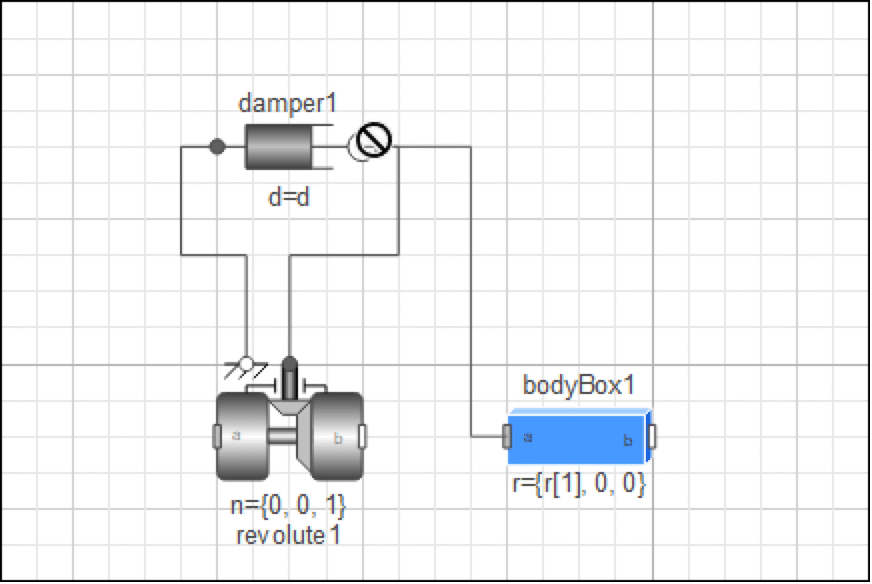
Example when the connection line is disabled between two incompatible connectors.
The MultiBody connectors are called "frames" and represent coordinate systems. Since we want the body to rotate around one end, we choose to connect frame_a of bodyBox1 to frame_b of the revolute joint.
For instance, to connect frame_a (gray connector) of bodyBox1 to frame_b (white connector) of the revolute joint component, place the mouse cursor above frame_a of bodyBox1, press the left mouse button, and hold it down while moving the mouse cursor to frame_b of the revolute joint component. To make the connection, release the mouse button.
The two flanges of the damper, which are connectors for one-dimensional mechanical systems, are connected to the flanges of the revolute joint in the same manner.
Since we want to use this model as a component, we need to add compatible connectors so the model can be linked to other components. With the Connection Line Tool, this task is simple. Place the mouse cursor above frame_b of bodyBox1, press the left mouse button, and hold it down while moving the cursor to the desired position of the new connector. To create the connection, right-click the mouse button and choose Create Connector, or just release the left mouse button when the cursor is positioned over the new connector. A compatible connector is created. A connector to frame_a of the revolute joint is created using the same method.
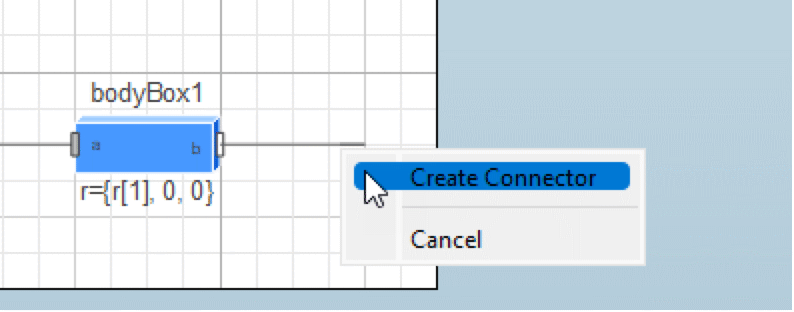
Adding a component connector with the Connection Line Tool.
We now would like to add parameters to the component to make it more flexible. This can be done using the graphical user interface, as described in Variable Views (the section on lifting variables is of particular relevance here), but this tutorial will take the opportunity to demonstrate usage of the Modelica Text View. While dropping and connecting the components, the model editor generates the Modelica code corresponding to the actions. Switch to the Modelica Text View to view the textual representation of the model. In the textual representation of the model, each component is declared and each connection between two components is represented by connect equations in the equation section.
In the textual view, we declare dimension vector r of bodyBox1 (length, width, height) and the damping coefficient d as model parameters. (For clarity, the Modelica code shown below has been simplified by excluding annotations and descriptions; see the Modelica Text View of ChainLink for a more truthful reflection of what the Modelica code could look like at this point.)
model ChainLink
  parameter Modelica.Units.SI.Position r[3] = {1, 0.1, 0.1};
  parameter Modelica.Units.SI.RotationalDampingConstant d = 1.0;
  Modelica.Mechanics.MultiBody.Joints.Revolute revolute1(useAxisFlange = true);
  Modelica.Mechanics.MultiBody.Parts.BodyBox bodyBox1(r = {r[1], 0, 0}, length = r[1], width = r[2], height = r[3]);
  Modelica.Mechanics.Rotational.Components.Damper damper1(d = d);
  Modelica.Mechanics.MultiBody.Interfaces.Frame_a frame_a;
  Modelica.Mechanics.MultiBody.Interfaces.Frame_b frame_b;
equation
  connect(revolute1.frame_a, frame_a);
  connect(revolute1.frame_b, bodyBox1.frame_a);
  connect(damper1.flange_b, revolute1.axis);
  connect(damper1.flange_a, revolute1.support);
  connect(bodyBox1.frame_b, frame_b);
end ChainLink;
We will now create an icon for the component. Switch to the Icon View and draw the component icon with the help of the Graphic Tools toolbar.
![]()
Note that the connectors were automatically added in the icon window when created with the Connection Line Tool.
We will let the chain link be graphically represented by an ellipse in the icon view. To change the ellipse properties, double-click the ellipse object or select it with the mouse and press Alt+Return.
Use the Text Tool to display the name of the component by adding an item with text %name. To also display parameter names and values, type parameterName=%parameterName. For example, to display the component parameters r and d, add two text boxes with the text r=%r and d=%d.
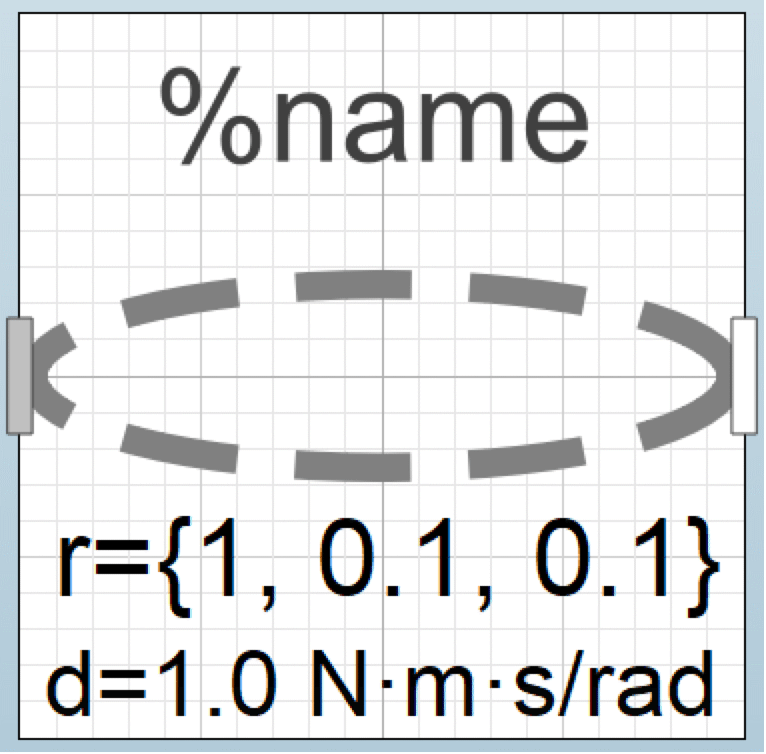
Icon View of the chain link component. Note that the similar ChainLink model has been given a more refined icon.
Chain Pendulum Model
Once we have the chain link component, the chain pendulum model is represented with a concatenation of four chain links connected to each other and to the initial frame. The Diagram View of the chain pendulum model is shown in the screen shot below.

Diagram View of the chain pendulum model. Note that diagram of ChainPendulum appears a bit different due to the refined look of the ChainLink icon.
Switch to Simulation Center and simulate the model for 10 seconds. The pendulum animation can be visualized after simulation by clicking the Animation button in the toolbar.
![]()
Animation is viewed by clicking the Animation button in the toolbar.
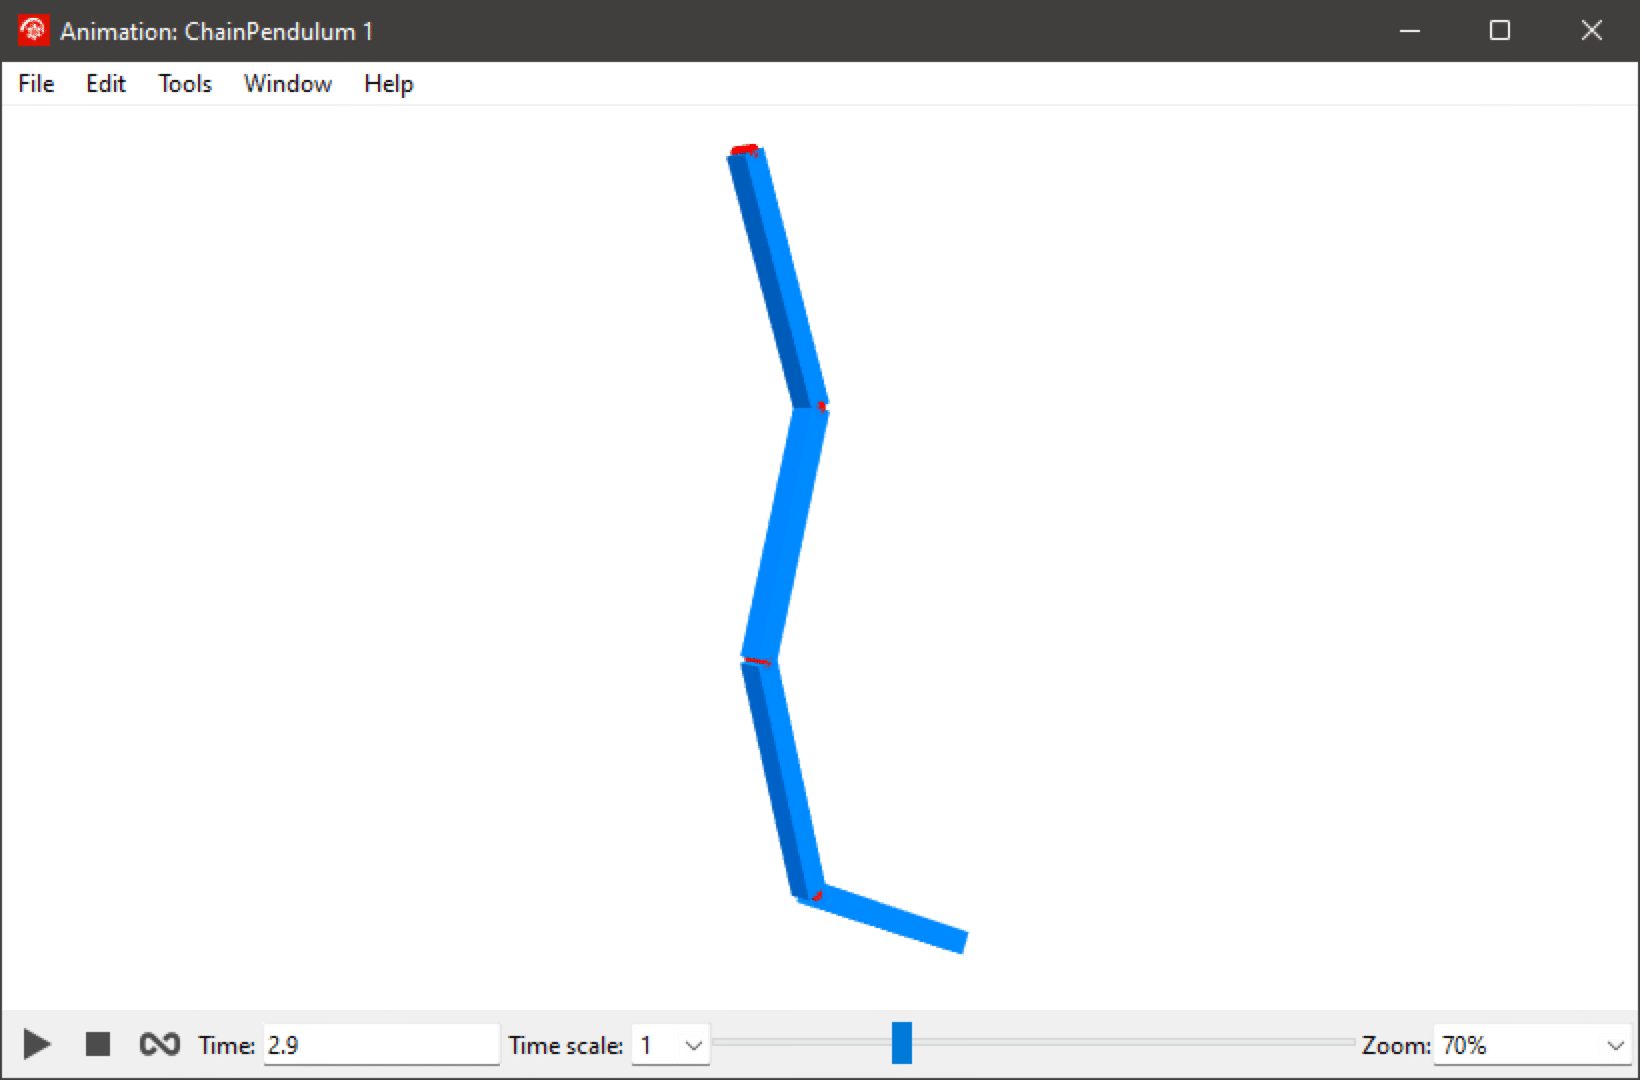
View of the chain pendulum animation at time 2.9 seconds.
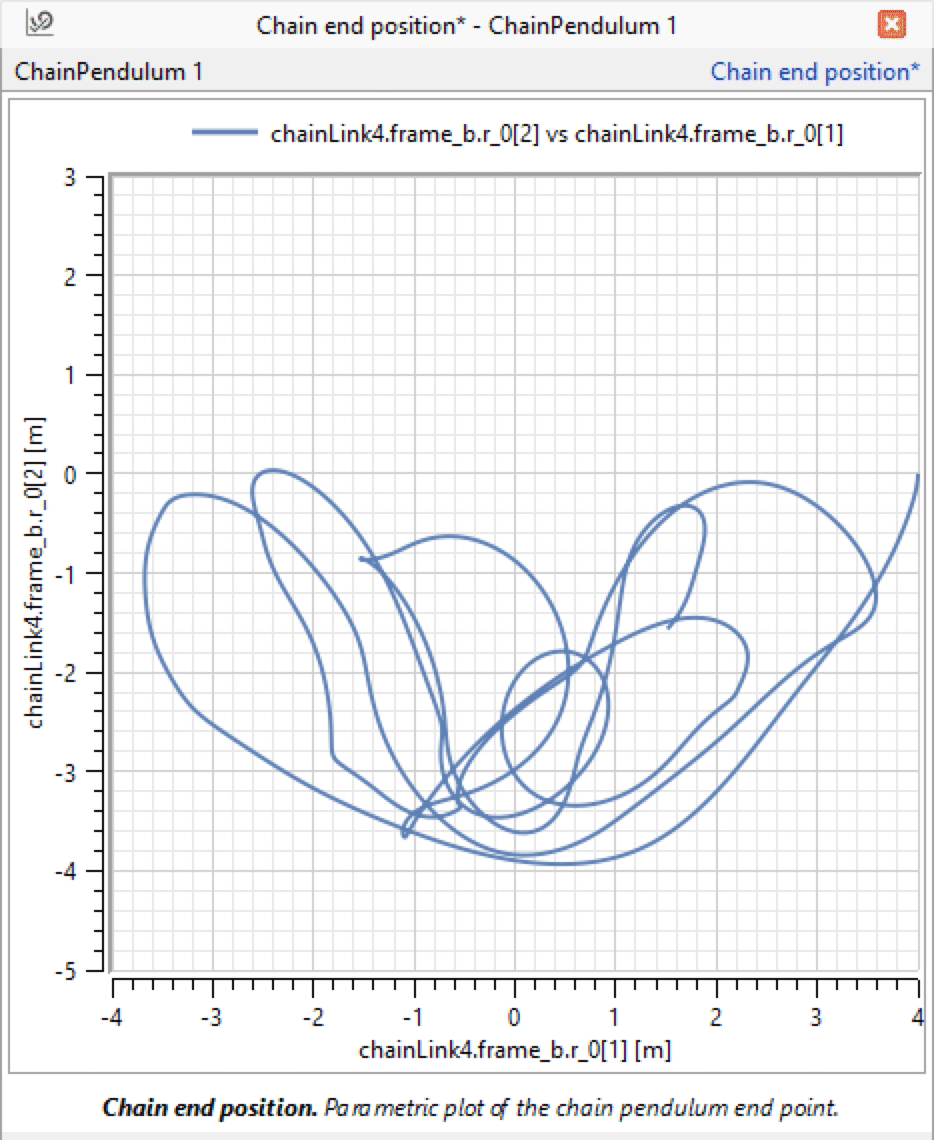
Position of the chain pendulum end point in a parametric plot. The exact trajectory that one gets might (slightly) differ due to the chaotic nature of the problem.
Exercise
The interested reader can create a more general chain pendulum component with the number of chain links as a parameter.
Hint: you can use a for loop to connect the chain links.
