
AnatomyPlot3D[primitives,options]
解剖学的実体と標準的な3Dグラフィックスプリミティブおよび指示子を使うことができる.三次元のグラフィカルな画像を表す.
AnatomyPlot3D
AnatomyPlot3D[primitives,options]
解剖学的実体と標準的な3Dグラフィックスプリミティブおよび指示子を使うことができる.三次元のグラフィカルな画像を表す.
詳細とオプション
- AnatomyPlot3Dの使用にはインターネット接続が必要である.
- AnatomyPlot3Dは,実体の"Graphics3D"特性に代るスタンドアロンの解剖学的実体を使って注釈の付いた3Dプリミティグを表すことができる.
- プリミティブの中にある実体は,実体の"RegionCentroid"に代る座標指定子として働く.
- AnatomyPlot3DはStandardFormでグラフィカルな画像として表示される.
- PlotRangeは,実体の"RegionBounds"に代る解剖学的実体を使って指定することができる.
- ヒトおよび動物の解剖学的実体の座標値は,ミリメートル単位で計測された標準的な成人男子と標準成獣に対応する.
- AnatomyPlot3Dには,Graphics3Dと同じ指示子に以下を加えたものが使える.
-
AnatomyStyling[directives] 解剖学的実体は指定されたグライックス指示子を使って描画される - AnatomyPlot3DにはGraphics3Dと同じオプションに以下の追加・変更を加えたものが使える. [全オプションのリスト]
-
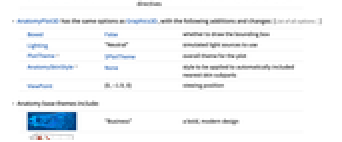
Boxed False 境界ボックスを描くかどうか Lighting "Neutral" 使用するシミュレーションによる光源 PlotTheme $PlotTheme プロットの全体的なテーマ AnatomySkinStyle None 自動的に含まれた,最も近い皮膚のサブパーツに適用するスタイル ViewPoint {0,-1.9,0} 視点 - 解剖学的基本テーマ
-
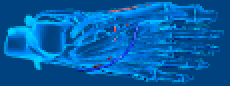
"Business" 大胆で現代的なデザイン 
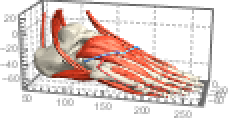
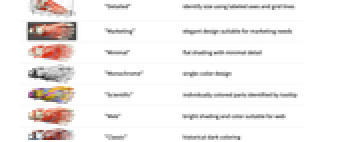
"Detailed" ラベル付きの軸と格子線を使ってサイズを特定 
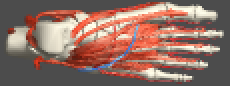
"Marketing" マーケティングニーズを満たす洗練されたデザイン 
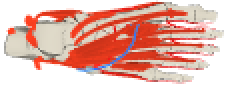
"Minimal" 最小限の詳細のフラットシェーディング 
"Monochrome" 単色デザイン 
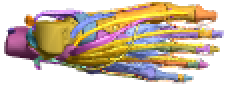
"Scientific" ツールチップで特定された,個別に彩色されたパーツ 
"Web" Webに適した明るいシェーディングと色 
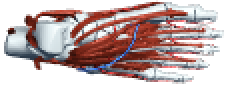
"Classic" 古典的な暗い色調 - 解剖学的特徴テーマ
-
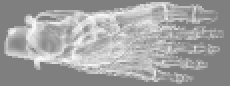
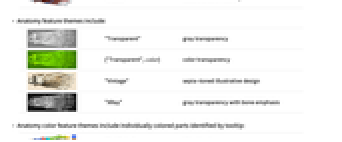
"Transparent" 灰色透過性 
{"Transparent",color} 彩色透過性 
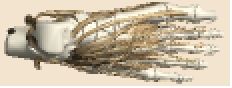
"Vintage" セピア色のイラスト的デザイン 
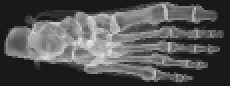
"XRay" 骨を強調した灰色透過性 - 解剖学的色特徴テーマには,ツールチップで特定される個別に彩色されたパーツが含まれる.
-
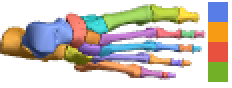
"BoldColor" 大胆な12色 
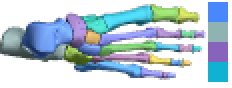
"CoolColor" 寒色系8色 
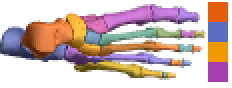
"DarkColor" ダークな8色 
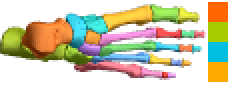
"NeonColor" 鮮やかな8色 
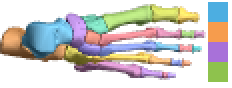
"PastelColor" パステル調の8色 
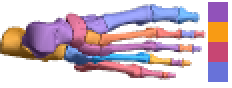
"RoyalColor" ロイヤルカラー8色 
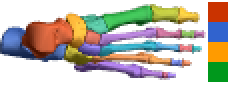
"VibrantColor" 明るい10色 
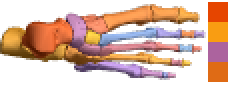
"WarmColor" 暖色系8色 -
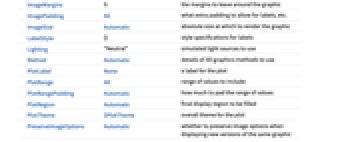
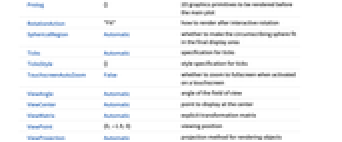
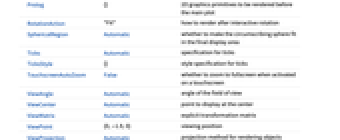
AlignmentPoint Center 整列の基準となるグラフィックス内のデフォルトの点 AnatomySkinStyle None 自動的に含まれた,最も近い皮膚のサブパーツに適用するスタイル AspectRatio Automatic 縦横比 Axes False 座標軸を描くか描かないか AxesEdge Automatic 座標軸をいずれの辺に置くか AxesLabel None 座標軸のラベル AxesOrigin Automatic 座標軸がどこで交差するか AxesStyle {} 座標軸のスタイルを指定するグラフィックス指示子 Background None プロットの背景色 BaselinePosition Automatic 周囲のテキストのベースラインとの揃え方 BaseStyle {} グラフィックスのベーススタイル指定 Boxed False 境界ボックスを描くかどうか BoxRatios Automatic 三次元の境界ボックスの比 BoxStyle {} ボックスのスタイル指定 ClipPlanes None 切取り平面 ClipPlanesStyle Automatic 切取り平面のスタイル指定 ContentSelectable Automatic コンテンツの選択を許容するかどうか ControllerLinking False いつ外部回転コントローラに接続するか ControllerPath Automatic どの外部コントローラを使ってみるか Epilog {} 主となるプロットの後に描く2Dグラフィックスプリミティブ FaceGrids None 境界ボックスの格子線 FaceGridsStyle {} 表面格子のスタイル指定 FormatType TraditionalForm テキストのデフォルトの書式 ImageMargins 0. グラフィックスの周囲の余白 ImagePadding All ラベル等にどの程度余分な充填を許すか ImageSize Automatic 描画するグラフィックスの絶対的サイズ LabelStyle {} ラベルのスタイル指定 Lighting "Neutral" 使用するシミュレーションによる光源 Method Automatic 使用する3Dグラフィックスメソッドの詳細 PlotLabel None プロット用ラベル PlotRange All 含める値の範囲 PlotRangePadding Automatic 値の範囲をどの程度充填するか PlotRegion Automatic 塗り潰す最終的な表示領域 PlotTheme $PlotTheme プロットの全体的なテーマ PreserveImageOptions Automatic 同じ画像を新たに描画する際に画像のもとのオプションを保存するかどうか Prolog {} 主なプロットに先駆けて描かれる2Dグラフィックスプリミティブ RotationAction "Fit" インタラクティブな回転の後でどのように描画するか SphericalRegion Automatic 最終的な表示領域に外接球をフィットさせるかどうか Ticks Automatic 目盛の指定 TicksStyle {} 目盛マークのスタイル指定 TouchscreenAutoZoom False タッチスクリーン上でアクティベートされた場合にフルスクリーンにズームするかどうか ViewAngle Automatic 表示フィールドの角度 ViewCenter Automatic 表示領域の中心に置く点 ViewMatrix Automatic 明示的な変換行列 ViewPoint {0,-1.9,0} 視点 ViewProjection Automatic ビューアから遠いオブジェクトを描画するための投影方法 ViewRange All 含むべき視距離の範囲 ViewVector Automatic 擬似カメラの位置と方向 ViewVertical {0,0,1} 垂直にする方向
全オプションのリスト
例題
すべて開く すべて閉じる例 (5)

AnatomyPlot3D[Entity["AnatomicalStructure", "LeftFemur"]]AnatomyPlot3D[Entity["AnimalAnatomicalStructure", "LeftFemur::CanisLupusFamiliaris::4t62p"]]AnatomyPlot3D[{Entity["AnatomicalStructure", "RightHand"]}]AnatomyPlot3D[{Entity["AnimalAnatomicalStructure", "LeftForefoot::CanisLupusFamiliaris::4t62p"]}]AnatomyPlot3D[{Entity["AnatomicalStructure", "LeftClavicle"], Red, Entity["AnatomicalStructure", "LeftScapula"]}]AnatomyPlot3D[{Entity["AnatomicalStructure", "RightHand"]}, PlotTheme -> "Business"]AnatomyPlot3D[{Entity["AnatomicalStructure", "LeftHand"], Blue, Arrow[{Entity["AnatomicalStructure", "DistalPhalanxOfLeftThumb"], Entity["AnatomicalStructure", "DistalPhalanxOfLeftIndexFinger"]}]}]スコープ (11)
彩色とスタイリング (3)
AnatomyPlot3D[{Blue, Entity["AnatomicalStructure", "LeftArm"]}]次の例は,上腕二頭筋のような「中間」構造は,たとえより小さい原子成分からなっている場合でも制御できることを示している:
AnatomyPlot3D[{AnatomyStyling[<|Entity["AnatomicalStructure", "BicepsBrachii"] -> Green|>], Entity["AnatomicalStructure", "LeftArm"]}]次の例は,より低レベルの原子構造を別々にスタイル付けできることを示している:
AnatomyPlot3D[{AnatomyStyling[<|Entity["AnatomicalStructure", "LongHeadOfLeftBicepsBrachii"] -> Green, Entity["AnatomicalStructure", "ShortHeadOfLeftBicepsBrachii"] -> Blue|>], Entity["AnatomicalStructure", "LeftArm"]}]次の例は,筋肉(あるいは他の実体)をある色で彩色し,残りのすべてのオブジェクトを別の1色で彩色できることを示している:

AnatomyPlot3D[{AnatomyStyling[<|_ -> Red, Entity["AnatomicalStructure", "Muscle"] -> Blue|>], Entity["AnatomicalStructure", "LeftArm"]}]引数がなければ,AnatomyFormはFaceForm[]のように振る舞う:

AnatomyPlot3D[{AnatomyStyling[], EdgeForm[Blue], Entity["AnatomicalStructure", "SeventhCervicalVertebra"]}]AnatomyForm["Natural"]は,それまでに使った指示子を無視して,もとの状態のスタイルを回復する:
AnatomyPlot3D[{Red, Entity["AnatomicalStructure", "SeventhCervicalVertebra"], AnatomyStyling["Natural"], Entity["AnatomicalStructure", "FirstThoracicVertebra"]}]プリミティブ (6)
AnatomyPlot3D[{Entity["AnatomicalStructure", "LeftHand"], Entity["AnatomicalStructure", "RightHand"], Red, Line[{Entity["AnatomicalStructure", "LeftHand"], Entity["AnatomicalStructure", "RightHand"]}]}]AnatomyPlot3D[{Entity["AnatomicalStructure", "SkeletonOfRightHand"], Red, Arrow[{{-175, -130, 758}, Entity["AnatomicalStructure", "RightFifthMetacarpalBone"]}, 5], Text["5th metacarpal", {-175, -130, 758}, {0, -1}]}]AnatomyPlot3D[{Entity["AnatomicalStructure", "HipBone"], Entity["AnatomicalStructure", "Scapula"], Opacity[.5, Red], Cuboid[Entity["AnatomicalStructure", "LeftHipBone"], Entity["AnatomicalStructure", "RightScapula"]]}]AnatomyPlot3D[{Entity["AnatomicalStructure", "SkeletonOfLeftUpperLimb"], Opacity[.5], Sphere[Entity["AnatomicalStructure", "LeftElbow"], 50]}]AnatomyPlot3D[{Entity["AnatomicalStructure", "LeftHumerus"], Entity["AnatomicalStructure", "LeftHand"], Opacity[.3], Cylinder[{Entity["AnatomicalStructure", "LeftElbow"], Entity["AnatomicalStructure", "LeftWrist"]}, 20]}]AnatomyPlot3D[{Entity["AnatomicalStructure", "LeftClavicle"], Entity["AnatomicalStructure", "LeftScapula"], Entity["AnatomicalStructure", "LeftHand"], Red, Tube[{Entity["AnatomicalStructure", "LeftShoulder"], Entity["AnatomicalStructure", "LeftElbow"], Entity["AnatomicalStructure", "LeftWrist"]}, 10]}]サブパーツのラベル付け (1)
層を切り取る (1)
AnatomyPlot3D[{Entity["AnatomicalStructure", "Aorta"], ClipPlanes -> {InfinitePlane[{{-3, -123, 1226}, {17, -143, 1226}, {-3, -143, 1206}}]}, Entity["AnatomicalStructure", "Heart"]}, PlotRange -> Entity["AnatomicalStructure", "Heart"]]AnatomyPlot3D[{Entity["AnatomicalStructure", "LeftHand"], ClipPlanesStyle -> {RGBColor[1, 0, 0, .3], RGBColor[0, 0, 1, .3]}, ClipPlanes -> {InfinitePlane[{{273 - 20, -146, 725}, {273 - 20, -146 - 20, 725}, {273, -146 - 20, 725}}], InfinitePlane[{{273 + 20, -146 - 20, 735}, {273 + 20, -146, 735 - 20}, {273, -146 - 20, 735 - 20}}]}, Entity["AnatomicalStructure", "SkinOfLeftHand"]}, Boxed -> True, Axes -> True]オプション (30)
AnatomySkinStyle (3)
解剖学的構造実体について,自動的に最も近くの皮膚のサブパーツを含める:
AnatomyPlot3D[{Entity["AnatomicalStructure", "LeftFemur"], Entity["AnatomicalStructure", "RightFemur"]}, AnatomySkinStyle -> Automatic]AnatomyPlot3D[{Red, Entity["AnatomicalStructure", "PituitaryGland"]}, AnatomySkinStyle -> Directive[Blue, Opacity[.3]], ViewPoint -> Left]AnatomyPlot3D[{Entity["AnatomicalStructure", "LeftFemur"]}, AnatomySkinStyle -> None]Axes (3)
デフォルトで,AnatomyPlot3DではAxesは描かれない:
AnatomyPlot3D[{Entity["AnimalAnatomicalStructure", "LeftForefoot::CanisLupusFamiliaris::4t62p"]}]AnatomyPlot3D[{Entity["AnimalAnatomicalStructure", "LeftForefoot::CanisLupusFamiliaris::4t62p"]}, Axes -> True]{AnatomyPlot3D[{Entity["AnimalAnatomicalStructure", "LeftForefoot::CanisLupusFamiliaris::4t62p"]}, PlotLabel -> "X axis", Axes -> {True, False, False}], AnatomyPlot3D[{Entity["AnimalAnatomicalStructure", "LeftForefoot::CanisLupusFamiliaris::4t62p"]}, PlotLabel -> "Y axis", Axes -> {False, True, False}], AnatomyPlot3D[{Entity["AnimalAnatomicalStructure", "LeftForefoot::CanisLupusFamiliaris::4t62p"]}, PlotLabel -> "Z axis", Axes -> {False, False, True}]}AxesLabel (3)
AnatomyPlot3D[{Entity["AnimalAnatomicalStructure", "LeftForefoot::CanisLupusFamiliaris::4t62p"]}, Axes -> True]AnatomyPlot3D[{Entity["AnimalAnatomicalStructure", "LeftForefoot::CanisLupusFamiliaris::4t62p"]}, Axes -> True, AxesLabel -> z]AnatomyPlot3D[{Entity["AnimalAnatomicalStructure", "LeftForefoot::CanisLupusFamiliaris::4t62p"]}, Axes -> True, AxesLabel -> {x, y, z}]AxesOrigin (2)
AnatomyPlot3D[{Entity["AnimalAnatomicalStructure", "LeftForefoot::CanisLupusFamiliaris::4t62p"]}, Axes -> True]AnatomyPlot3D[{Entity["AnimalAnatomicalStructure", "LeftForefoot::CanisLupusFamiliaris::4t62p"]}, Axes -> True, AxesOrigin -> {0, 0, -100}]AxesStyle (4)
AnatomyPlot3D[Entity["AnatomicalStructure", "LeftHand"], Axes ->
True, AxesStyle -> Red]AnatomyPlot3D[Entity["AnatomicalStructure", "LeftHand"], Axes ->
True, AxesStyle -> {Directive[Thick, Red], Directive[Thick, Blue], Directive[Thick, Green]}]AnatomyPlot3D[Entity["AnatomicalStructure", "LeftHand"], Axes ->
True, AxesStyle -> Blue, TicksStyle -> Red]AnatomyPlot3D[Entity["AnatomicalStructure", "LeftHand"], Axes ->
True, AxesStyle -> Black, LabelStyle -> Red]Method (3)
デフォルトでツールチップが有効になっているが,"Tooltips"を使って無効にすることができる:
AnatomyPlot3D[Entity["AnatomicalStructure", "LeftIndexFinger"], Method -> {"Tooltips" -> False}]PlotTheme設定の中にはデフォルトでツールチップが無効になっているものがあるが,"Tooltips"を使って有効にできる:
AnatomyPlot3D[Entity["AnatomicalStructure", "LeftIndexFinger"], PlotTheme -> "Minimal", Method -> {"Tooltips" -> True}]AnatomyPlot3D[Entity["AnatomicalStructure", "LeftFoot"]]これらの3D構造の周りの余白は"ShrinkWrap"で最小にすることができる:
AnatomyPlot3D[Entity["AnatomicalStructure", "LeftFoot"], Method -> {"ShrinkWrap" -> True}]同じ構造を2回描画すると,スタイルが無視される等の描画問題が起こることがある:
AnatomyPlot3D[{Style[Entity["AnatomicalStructure", "DistalPhalanxOfLeftIndexFinger"], Red], Entity["AnatomicalStructure", "LeftIndexFinger"]}]この問題を回避するために,しばしば"RelieveDPZFighting"が使われる:
AnatomyPlot3D[{Style[Entity["AnatomicalStructure", "DistalPhalanxOfLeftIndexFinger"], Red], Entity["AnatomicalStructure", "LeftIndexFinger"]}, Method -> {"RelieveDPZFighting" -> True}]PlotRange (1)
PlotRangeを50ミリの充填で特定の実体に制限する:
AnatomyPlot3D[{Entity["AnatomicalStructure", "LeftFemur"], Entity["AnatomicalStructure", "LeftTibia"], Entity["AnatomicalStructure", "LeftFibula"], Entity["AnatomicalStructure", "LeftPatella"]}, PlotRange -> Entity["AnatomicalStructure", "LeftPatella"], PlotRangePadding -> 50]PlotTheme (2)
AnatomyPlot3D[{Entity["AnatomicalStructure", "LeftHand"]}, PlotTheme -> "Classic"]AnatomyPlot3D[{Entity["AnatomicalStructure", "LeftHand"]}, PlotTheme -> "Scientific"]AnatomyPlot3D[{Entity["AnatomicalStructure", "LeftHand"]}, PlotTheme -> "Minimal"]AnatomyPlot3D[{Entity["AnatomicalStructure", "LeftHand"]}, PlotTheme -> "Vintage"]AnatomyPlot3D[{Entity["AnatomicalStructure", "LeftHand"]}, PlotTheme -> "XRay"]AnatomyPlot3D[{AnatomyStyling[<|EntityClass["AnatomicalStructure", "Bones"] -> "Natural"|>], Entity["AnatomicalStructure", "LeftHand"]}, PlotTheme -> {"Transparent", Hue[.58]}]SphericalRegion (1)
デフォルトで,描画された場面は境界ボックスの中心が中心となる:
AnatomyPlot3D[Entity["AnatomicalStructure", "RightFoot"]]SphericalRegionを使って特定の要素の周りに場面の中心を置き,ビューを境界球の要素に限定することができる:
AnatomyPlot3D[Entity["AnatomicalStructure", "RightFoot"], SphericalRegion -> Entity["AnatomicalStructure", "RightThirdMetatarsalBone"]]Ticks (4)
AnatomyPlot3D[{Entity["AnatomicalStructure", "LeftHand"]}, PlotTheme -> "Classic", Axes -> True]AnatomyPlot3D[{Entity["AnatomicalStructure", "LeftHand"]}, PlotTheme -> "Classic", Axes -> True, Ticks -> None]AnatomyPlot3D[{Entity["AnatomicalStructure", "LeftHand"]}, PlotTheme -> "Classic", Axes -> True, Ticks -> {{220, 250, 300}, {-100, -120, -150}, {650, 700, 800}}]AnatomyPlot3D[{Entity["AnatomicalStructure", "LeftHand"]}, PlotTheme -> "Classic", Axes -> True, Ticks -> {{{220, a}, {250, b}, {300, c}}, {{-100, d}, {-120, e}, {-150, f}}, {{650, g}, {700, h}, {800, i}}}]TicksStyle (4)
AnatomyPlot3D[{Entity["AnatomicalStructure", "LeftHand"]}, PlotTheme -> "Classic", Axes -> True, TicksStyle -> Directive[Bold, Red]]AnatomyPlot3D[{Entity["AnatomicalStructure", "LeftHand"]}, PlotTheme -> "Classic", Axes -> True, TicksStyle -> {Directive[Black, Bold], Directive[Bold, Red], Directive[Bold, Blue]}]AnatomyPlot3D[{Entity["AnatomicalStructure", "LeftHand"]}, PlotTheme -> "Classic", Axes -> True, Ticks -> {{{220, a, .1}, {250, b, .1}, {300, c, .1}}, {{-100, d, .2}, {-120, e, .2}, {-150, f, .2}}, {{650, g, .15}, {700, h, .15}, {800, i, .15}}}]各目盛を,位置,長さ,ラベル付け,スタイル付でカスタマイズする:
AnatomyPlot3D[{Entity["AnatomicalStructure", "LeftHand"]}, PlotTheme -> "Classic", Axes -> True, Ticks -> {{{220, a, .1, Directive[Red]}, {250, b, .1, Directive[Red]}, {300, c, .1, Directive[Red]}}, {{-100, d, .2, Directive[Blue, Thick]}, {-120, e, .2, Directive[Blue, Thick]}, {-150, f, .2, Directive[Blue, Thick]}}, {{650, g, .15, Directive[Blue]}, {700, h, .15, Directive[Blue]}, {800, i, .15, Directive[Blue]}}}]アプリケーション (1)
サブパーツにラベルを付ける,より自動化された方法として,解剖構造の領域特性を使う方法がある:
anatomyCallouts[entities_, callouts_List] := Module[{scene, pr, sc, sr, cr},
pr = PlotRange /. AbsoluteOptions[scene = AnatomyPlot3D[{entities}], PlotRange];{sc, sr} = {Mean /@ pr, Norm[Subtract@@@pr] / 2};
cr = Rule@@@AnatomyData[callouts, {"Name", "RegionCentroid"}];
Show[scene, Graphics3D[{Red, Line[{#[[2]], sr Normalize[(#[[2]] - sc)] + sc}]& /@ cr, Black, Inset[Style[#[[1]], Bold, 16], 1.1sr Normalize[(#[[2]] - sc)] + sc, Background -> GrayLevel[.95]]& /@ cr}], ImageSize -> {500, 400}]]anatomyCallouts[{Entity["AnatomicalStructure", "Skull"]}, {Entity["AnatomicalStructure", "FrontalBone"], Entity["AnatomicalStructure", "OccipitalBone"], Entity["AnatomicalStructure", "RightTemporalBone"], Entity["AnatomicalStructure", "RightParietalBone"], Entity["AnatomicalStructure", "LeftParietalBone"], Entity["AnatomicalStructure", "LeftTemporalBone"]}]特性と関係 (1)
AnatomyPlot3Dで使われるモデルは,EntityValueを使って"Graphics3D"特性から得られるものと同じである:
model = Entity["AnatomicalStructure", "HipBone"]["Graphics3D"]モデルの構造の各サブパーツにはラベルを付けたり他の参照を保存したりするのに便利なAnnotationが含まれる:
Cases[model, _Annotation, ∞] /. Annotation[body_, ann_] :> Inactive[Annotation][Graphics3D[body], ann]考えられる問題 (1)
同じ構造を2回描画すると,スタイルが無視される等の描画上の問題が起こることがある:
AnatomyPlot3D[{Style[Entity["AnatomicalStructure", "ProximalPhalanxOfLeftIndexFinger"], Red], Entity["AnatomicalStructure", "SkeletonOfLeftHand"]}]"RelieveDPZFighting"を使ってこのような問題を部分的に回避することができる:
AnatomyPlot3D[{Style[Entity["AnatomicalStructure", "MiddlePhalanxOfLeftIndexFinger"], Red], Entity["AnatomicalStructure", "SkeletonOfLeftHand"]}, Method -> {"RelieveDPZFighting" -> True}]よりよい回避策は同じ構造を2回描画しないことではあるが,AnatomyStylingを使ってその場でスタイルを修正することもできる:
AnatomyPlot3D[{AnatomyStyling[<|Entity["AnatomicalStructure", "MiddlePhalanxOfLeftIndexFinger"] -> Red|>], Entity["AnatomicalStructure", "SkeletonOfLeftHand"]}]おもしろい例題 (4)
Overlayを使って解剖学的構造を皮膚の輪郭上に置く:
Block[{opts = {PlotRange -> Entity["AnatomicalStructure", "Skin"], ViewAngle -> 14°, ViewCenter -> {.5, 0, .7}}}, Overlay[{AnatomyPlot3D[{AnatomyStyling[{Directive[Lighting -> {{"Ambient", White}}, GrayLevel[.3]]}], Entity["AnatomicalStructure", "Skin"]}, Background -> GrayLevel[.2], opts], AnatomyPlot3D[{Entity["AnatomicalStructure", "AlimentarySystem"]}, opts]}]]サブパーツを透過的構造の中に置くときにOpacityを制御する:
AnatomyPlot3D[{AnatomyStyling[<|_ -> Opacity[.15], Entity["AnatomicalStructure", "TricuspidValve"] -> White|>], Entity["AnatomicalStructure", "Heart"]}, PlotTheme -> {"Transparent", Red}]解剖学的構造にRotateを適用する:
Manipulate[AnatomyPlot3D[{Entity["AnatomicalStructure", "Neurocranium"], Entity["AnatomicalStructure", "ZygomaticBone"], Entity["AnatomicalStructure", "SphenoidBone"], Entity["AnatomicalStructure", "NasalBone"], Entity["AnatomicalStructure", "Maxilla"], Entity["AnatomicalStructure", "MaxillaryDentition"], Rotate[{Entity["AnatomicalStructure", "Mandible"], Entity["AnatomicalStructure", "MandibularDentition"]}, Dynamic[t Degree], {1, 0, 0}, {0.33, -106., 1470.}]}, SphericalRegion -> True, PlotRange -> Entity["AnatomicalStructure", "Skull"], PlotRangePadding -> 20], {t, 0, 20}, SynchronousUpdating -> False]
| |
ClipPlanesを特定のオブジェクトに適用する:
Manipulate[
AnatomyPlot3D[{Entity["AnatomicalStructure", "LeftUpperLimb"], ClipPlanes -> Dynamic[{InfinitePlane[{{0, -300, z}, {300, -300, z + 200}, {200, 0, z}}]}], Entity["AnatomicalStructure", "SkinOfLeftUpperLimb"]}],
{z, 400, 1400}, SynchronousUpdating -> False
]関連するガイド
テキスト
Wolfram Research (2016), AnatomyPlot3D, Wolfram言語関数, https://reference.wolfram.com/language/ref/AnatomyPlot3D.html (2019年に更新).
CMS
Wolfram Language. 2016. "AnatomyPlot3D." Wolfram Language & System Documentation Center. Wolfram Research. Last Modified 2019. https://reference.wolfram.com/language/ref/AnatomyPlot3D.html.
APA
Wolfram Language. (2016). AnatomyPlot3D. Wolfram Language & System Documentation Center. Retrieved from https://reference.wolfram.com/language/ref/AnatomyPlot3D.html
BibTeX
@misc{reference.wolfram_2026_anatomyplot3d, author="Wolfram Research", title="{AnatomyPlot3D}", year="2019", howpublished="\url{https://reference.wolfram.com/language/ref/AnatomyPlot3D.html}", note=[Accessed: 15-August-2026]}
BibLaTeX
@online{reference.wolfram_2026_anatomyplot3d, organization={Wolfram Research}, title={AnatomyPlot3D}, year={2019}, url={https://reference.wolfram.com/language/ref/AnatomyPlot3D.html}, note=[Accessed: 15-August-2026]}